Wednesday, November 13, 2013

Felted-Wool Blanket Tutorial

Birdy's blanket. I am still supposed to be making a small version for Strawberry.
I have been promising this sweaters-to-blanket tutorial for a long time. (Very slight Owl Moon reference. "I had been waiting to go owling for a long time." Sigh.) But this is the perfect, cozy time of year to hole up with some wool, a glass of wine, and a nice, rewarding sewing project. Plus, if you start now, you can make one for a very special Christmas present. The kind of Christmas present where you maybe have to say, "Can you believe I made that?" and redirect the person's attention from the newly unwrapped knife sharpener back to the blanket, because maybe they don't understand quite all what was involved. Be sure to tell them.

Are you ready? It goes like this.

Ben's blanket.
1. Get the sweaters. Dig through your closets, hit up friends and relatives, and go to thrift shops and hospice shops to find 100% wool sweaters. Lambswool is my absolute favorite. Merino is excellent. Shetland is finicky but will, with persistence, felt. Cashmere is lovely when it works, but also a bit finicky. Some percentage of angora is terrific, but do not go with sweaters that are even 20% nylon because they will pill. I speak from experience, having used them and regretted it. 100% wool. The bigger the better because they will get very small. Nothing that says "washable," because then it won't shrink and felt up. Don't worry about small holes, which will disappear, or rips or stains, which can be simply cut away. Cardigans are fine. (I even sometimes use the buttons.)

My approach is always the same, which is to pick a color family and stick with it. Purples, greens, pinks, blues. But you could make a motley one if you prefer. If you are finding fantastic and inexpensive sweaters in multiple colors, you could consider making two blankets! I would budget $35 for the sweaters--and less if your thrift store has a half-off day.

Reds, pinks, oranges, with a black border. One snuggle beneath, then we gave it away to dear friends, where I can still visit with it.
A note: this part--the amassing of the sweaters--usually takes me a couple of weeks. You need 8-12 sweaters, depending on how big they are, plus 3 or so in a different color if you want to edge it.


2. Felt the sweaters. When you wash and dry it, pure wool will shrink and get nice and tight, with all the fibers matted together so that you can cut it and it won't stretch or fray. However, this won't necessarily happen the first time you wash and dry it, so be patient. Some sweaters require multiple trips through the washer and dryer. Here's how:
  • Wash them. Put the sweaters in the washing machine with a cup of dish-washing detergent. I know! But it's harsh and abrasive, and works well. I also put in a pair of jeans or two, for abrasiveness, and the Velcro paddles from this game, for added fiber-matting! I really do. Do a hot wash with a cold rinse--the temperature swing is supposed to help seize up the fibers extra much. Lots of people recommend putting them in a pillow case first, to protect your machines.
  • Dry them. Put the sweaters in the dryer and dry them on high.
  • Evaluate them. If they are still stretchy, or you can really see the knit stitches in the body of it, then they're not felted. Back into your washer. Keep at it. Some will give in eventually and others won't. I have even boiled sweaters in a big pot of water, which makes the house smell like a sheep in a thunderstorm, but I am just that devoted to my art. If you have sweaters that don't seem thick and felted do not use them. No matter how gorgeous they may be. I speak from experience here: a sweater that is fraying or stretching will have you ruing the day.
  • Worry about your machines. Which may get clogged with lint. I don't know what to tell you. I do it anyway.
 3. Make a plan. Should this have been Step 1? Probably. But this is how it is. I pretty much do all my sweaters the same way: a 7 by 10 grid of 6-inch squares. This makes a generous throw blanket. If you are making a baby blanket or a bed blanket, adjust accordingly. Knowing that I need 70 (6-inch) squares is as far as my planning goes.

I made a baby blanket with 3-inch squares, and it was very cute. You can hardly see how cute it is, what with that baby plunked right on it!
4. Cut the squares. I cannot enough recommend that you get a rotary cutter for this job--and for all your sewing, actually. This is the one I have, and I swear it has paid for itself in inexpensive sewn items that make beautiful gifts. But it also means that you'll need a large cutting mat. And, if you give a mouse a cookie, while we're at it, you should go ahead and get a transparent quilter's ruler (mine is 6- by 12-inches) which, again, will make everything so much easier. You can do this with a pair of scissors and a 6-inch cardboard square that you trace around with a disappearing pen or tailor's chalk, but it will be much more difficult and frustrating.


I cut all my sweaters the same way: I cut the arms off. Then I cut up each side of the body and across the shoulders to make 2 piece that I can lay flat on my cutting mat. I then try to get as many 6- by 12-inch pieces out of them as I can by pressing and holding the cutting mat on the sweater and cutting around it with the rotary cutter. (I cut these in half.) Eventually, I cut 6-inch squares from what's left and, finally, I cut the sleeves open and get what I can from them. I don't worry too much about seams running through my squares, as long as they're not too close to the edge, which can make sewing hard later. I also happily use ribbed parts, assuming they have felted well, which they are inclined not to do. If they aren't felted, don't use them. Pockets are fun to include.

pocket detail
Cut all the sweaters (and then some) until you have enough squares.


5. Arrange your squares. This is the fun part.
I would never! Oh, wait. I did. (This is a different blanket.)
I lay them all out on the floor, and then the kitty runs through them and I curse at him and tip the wine bottle to see if there's any fucking wine left, which there's not, while the kids make fun of me for being such a weird mix of crafty and crass.


Take your time, because this is the blanket you're going to make! I usually go for random, but kind of spaced out evenly, if that makes sense. Usually there's more of one thing than another, and it's all a bit of a challenge, getting it to look right. If there's a color or pattern you are turning out not to like, now is the time to be honest with yourself, even if it means another trip to the Salvation Army.


6. Pile your columns. This has taken me a long time to codify, but I really think this method works to keep the squares organized and in the design you arranged: Pile all the squares from one column, bottom to top, keeping them in order, and ending with the top square on top. Label it with a piece of tape that says which column number it is, starting with 1 at the far left. (As you can see, in the spread-out version above, I number my columns with tape before i even pile them.)

7. Stitch the squares together. I do this on a sewing machine, and can't quite imagine doing it by hand. What you'll want to do is set your machine to do a nice wide zigzag and then, this is kind of crazy and fun, you're simply going to hold two squares with their edges bumped up against each other, and you're going to zigzag them together, doing a little back stitch at the start and end to secure the thread. (If one piece is much thinner than another, you can overlap them the teeniest bit as you're sewing.) You won't want, or be able, to pin them--which means that you'll be able to adjust a little as you go--pulling this square a little, or pushing that one, so that they stay lined up.


Does that make sense? So, for each column, you're going to start with the top square and sew the square underneath it (in the pile) to the right edge of it (back stitch, cut the thread), then the next square underneath (in the pile) to the right edge of that second one (back stitch, cut the thread), etc. until you've got your whole column sewn together. You have to do a lot of stopping and starting, but that's okay, right? Take your time, breathe deeply, and relax.

You'll do this for each column, until you've got 7 columns of ten sewn-together squares (or whatever numbers you chose). Arrange these on the floor again, in the correct order. Knot and trim extra threads at this point so they don't get caught in your machine when you stitch the columns together.


8. Stitch the columns together. Sew top to bottom, starting by stitching column 2 to the right of column 1, then 3 to 2, etc. This is my favorite part, because you get to do nice, long swaths of stitching. Adjust as you go so that the rows end up lining up more or less. Back stitch a little at the beginnings and ends to secure the stitching.

9. Fuss with it. Lay your blanket back out and knot and /or trim all the stray threads (there will be many). Peel off the tape. Hold it up to the light to determine if there are any holes or gaps in your stitching, and sew them up on the machine. (Neatness is not my great strength.) Decide if you want to make a border for it or if you've had about all you can take at this point.


10. Make a border. You might as well. I often do this in black, since it's easy to find a lot of black sweaters, but Birdy wanted hers to match. I cut two-inch-wide strips, as long as I can, from the sweaters and sleeves and scraps, then sew these together, then cut them again to the right size for each side of the blanket. You will need to do some math, so ask a child to help you. You'll need two 42-inch lengths (7 X 6) plus 2 64-inch lengths ((10 X 6) + (2 X 2)). Which is a lot of fucking border, so maybe skip it. Sew the border on the same way you sewed the rest of it, overlapping very slightly if there are places where the edge is uneven.

11. Feel wildly satisfied. You really will, I'm not kidding. In part because you've made such a lovely spot for the cat to sleep.


Don't feel like making one? Buy one from the amazing Crispina Ffrench, whose blankets, spied in a Berkshires shop, first inspired me back in 2004. . . 
 
Did you want to use leftover scraps to make a pillow? Or have you kind of, you know, had enough?

We machine wash and dry ours, on the assumption that whatever is going to happen has happened already, but you could be more careful, if you like!

Have fun, if you make one! Or enjoy *not* making one.

xo

Wednesday, November 06, 2013

Staying Alive in Avalanche Terrain

To whichever one of you bought that book after linking to Amazon from here: Be careful, okay?

Gratuitous cat/partner photograph. 
Did I ever link to this piece over at Brain, Child? If not, there it is. Also, I believe I have something in the November O magazine. I keep meaning to tell you that, but then I forget to check and make sure it's true.

xo

Monday, November 04, 2013

Barbecue Pork Sliders (in the Crock Pot)


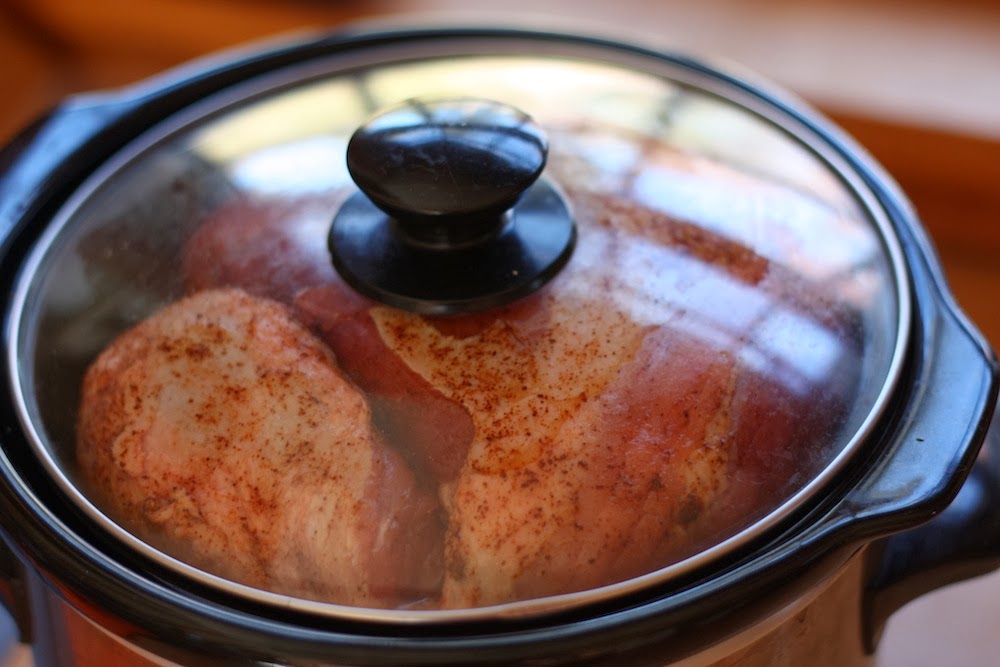
You want me. You know you want me.
There are some foods that are such outrageous crowd pleasers that you feel like a jerk to so often subject everybody to your lentil loaves and kale goulash when all you’d have to do to make everyone’s day is ignore a piece of pork in the crock pot for 5 hours. (In my defense, given that some of our nearest and dearest are vegetarians and/or observant Muslims, this would not always be a viable option.)

Also from this angle, you still want me.
But when Ben’s birthday came around, and I offered to make him anything his little heart desired (short of deep frying, which is what God invented the chicken-wing place for), this is what he picked.

For the record, I do not like the white buns! I like the pork, straight-up. Although, full disclosure, I like a less sweet shredded pork even better.

Specifically what he picked was “Nancy Stekl’s barbecue pork sliders,” which our beloved and generous neighbor brings to every potluck—on an enormous platter—while I’m busy trying to force the entire neighborhood to choke down whatever turnip-spelt concoction our farm share has led me too.

teenagers + bbq pork sliders = good
When I emailed Nancy a couple of years ago to ask for the recipe, this is what she wrote:
“Catherine, it's hopelessly lame; I just rubbed some Cajun spices on some pork butt, put it in some sliced onions in the crock pot, added about 1 cup of chicken stock and let it go. When it was done (maybe 5 hours on high), I shredded it and dumped in a bottle of traders joes BBQ sauce and warmed it up again.”

Why Nancy, that *is* hopelessly lame! I’m kidding. What it is is brilliantly simple.


Why is your pork wearing an elastic obstetric panty? I don't know.
Okay, the truth is, I *do* know. Out of its panty, the pork is not attractive. Just rub it down with the spice mixture, and try not to think about it too much.
It ends up tasting like the pork barbecue you’d get at maybe not the very best bbq place you ever went to, but a pretty darn good one. The meat is shreddy and tender, sweet and smoky and perfect. Cajun seasoning appears to be a mixture of salt, red pepper, black pepper, thyme, celery seed, paprika, garlic, and onion, and it's good here. You could probably mix some up yourself, but I bought it bulk at Whole Foods. Because I am very obedient.

"Ma, ma, it's too crowded in here!" I actually ended up doing this whole batch in the Dutch oven in a 300 oven for 5 hours. Unless your crock pot is huge, you cannot double the recipe, it turns out.
Serving this on slider buns is really kind of gilding the lily here. Or forcing the lily to root itself in refined flour? Something. It is not my typical MO, as you know. But it was Ben’s special request, after all, so we went for it. In my dream world, there would also be coleslaw. But it wasn’t my birthday now, was it?

When it was done cooking, but not yet shredded, it looked like this.
Fall-Apart Barbecue Pork (in the Crock Pot)
Makes 4-8 servings, depending on a lot of factors, including how many teenagers are eating with you and whether any of them are vegetarians. (I made bbq tofu sliders too! I don't have as much to say about them, in truth, but they were pretty good.) This is my very basic $15 slow cooker.

1 (3-3 ½ pound) boneless pork butt (this might be called boneless picnic shoulder)
2 teaspoons kosher salt
2 teaspoons Cajun seasoning
1 onion, sliced
1 cup chicken broth (water would probably be fine, honestly)
1 bottle barbecue sauce (I use Trader Joe’s Bold and Smokey Kansas City Style)

Okay, ready for how hard this is? Take the pork out of its elastic panty, if it’s wearing one, and rub it all over with the salt and seasoning. Now put the onion in the bottom of the crock pot, lay the pork on top of it, and pour in the chicken broth. Cook on high for 5 or 6 hours (or on low for 8 or more hours) until the pork falls apart if you so much as look at it. (More exactly: Press a piece of pork with a wooden spoon. If it doesn’t yield into shreds, it’s not ready.)

At this point, I behave in a slightly fussy manner. I remove the meat to a plate, let it cool slightly, and then use a fork and/or my fingers to remove anything that looks like someone wouldn’t want to eat it. Pieces of skin or large pieces of fat or connective tissue (although, in truth, most of the nasty stuff is dissolved, in a good way). While you’re doing this, the pork will more or less shred itself, but if it doesn’t, use a fork or two to help it along.

Put the pork back into the crock pot and stir it around with the liquid,* then add the barbecue sauce, stir it, and cook on low for another hour. Serve on buns or not, as you prefer.

* If there is a lot of liquid, I sometimes transfer the whole thing to a Dutch oven at this point, so that I can heat it in the oven with the lid off and reduce the liquid a little. Which is not really in the spirit of crock-pot convenience, I realize.

Friday, November 01, 2013

Pornographic Pork Teaser

Bite me.

Next week, I promise. My neighbor Nancy's bbq pork slider recipe.

Have a good weekend, my darlings. Don't eat too many Milk Duds.

xo

Friday, October 25, 2013

Perfect Pasta for a Crowd


I can't tell if this is a useful recipe or, like, pizza toast.
At Michael’s parents’ house, there used to be a plaque on the fridge with this quote: “I would rather sit on a pumpkin and have it all to myself, than be crowded on a velvet cushion.” Thoreau said that. But my awesome sister-in-law taped a note over it that said, “I would rather be crowded on a pumpkin than have a velvet cushion all to myself.”

But, given that it's one of the things I make most often, it seemed worth sharing.
Most of the time, that is exactly how I feel. For example, what was I thinking, having only two children? I planned poorly. I should have had 5 or 6 children or at least 4. And more cats. More, more, more. Which is why, often, large or very large groups of friends are over at our house. Or we’re over at someone else’s house. And the deal used to be this: you could invite everyone over for an impromptu dinner, but you had to order pizza and not feel lame about it. That way, nobody had to worry that you were being put out. Plus, you maintained the happy social principle, which is that you’d rather be crowded around a pizza than hunched alone over a leg of duck confit. 

I usually bake it in our huge 16-inch roasting pan, but this particular evening I split it up to put meat sauce on half.
Only, honestly, I’m too cheap to order pizza for 20 as often as I want people to stay for dinner. That’s a long way of getting to this pasta dish, which is one of the best and most satisfying ways I know to feed a large group of kids and adults. Add big green salad or a crate of clementines, and that’s it. You need nothing else. Everybody loves it. And recently, a young friend of ours said, “Oh, awesome! We always have this over here!” I took it as a compliment. Which was how it was intended.

Perfect Pasta for a Crowd
This is delicious. But: you really have to attend to the details here. That means really salting the water, really buttering the pasta before you put sauce on it, and really grating a pound of cheese. (It also means really waiting until bionaturae pasta goes on madness sale at Whole Foods.) Those small things elevate this dish from humdrum to utterly wonderful. You’ll see. (If you’ve eaten this at my house a million times, and are sniggering at the words “utterly wonderful,” I am giving you the finger, lovingly.)

A note on amounts: how much pasta you will need varies wildly, depending on how many people you have, how many of them eat a lot, and how good it is. Two pounds will feed around 10, and three pounds will feed 15 to 20. I know that makes no sense, in terms of the math, but I think that if there are lots of people over, then all the kids are too excited to eat much. (Just a theory.)

2-3 pounds good whole-wheat pasta shapes (as I’ve said before, I love bionaturae)
4-6 tablespoons butter
1 ½-2 quarts mild, tasty sauce (see below)
1 pound whole-milk mozzarella, grated (Don't use fresh mozzarella, because it's expensive and will be impossible to grate. Unless that's what you have, then do use it. Get a kid to dice it for you by putting chunks of it in an egg slicer each of the three direction, to make perfect little cubes. Fun and effective.)
1 cup freshly grated parmesan

Bring a very large pot of water to a boil, and salt it until it is as salty as seawater. This does not mean dainty sprinkles of salt out of the shaker; this means big handfuls of salt. Really. Salt the water, stir it, and taste it. Keep salting until it's salty. Aren’t I bossy? I’m sorry.

Cook the past according to the package directions, then drain it, put it back in the pot, add the butter, and stir until the butter melts and coats the pasta. Add enough sauce to coat the pasta thoroughly, then add a little more sauce, then stir in the mozzarella and pour the pasta into a large, greased roasting pan--not a lasagna-sized pan, but the 16-inch kind you'd usually cook a turkey in. (It’s different in the photos here, because I used meat sauce on half of it, and so used smaller pans.) Sprinkle on the grated cheese.

Put the pan in a 350 oven and bake for around a half an hour, although this part is forgiving. If you want to bake it for longer, because of timing or a hunch about what will taste best, you can cover it for half an hour, and then uncover it for another twenty minutes or so.

Basic Tomato Sauce
This makes a lot of sauce, which you need.

1/3 cup olive oil
1 large onion, finely chopped
2 stalks celery, finely chopped
1 teaspoon kosher salt, plus more to taste
2 teaspoons granulated garlic (or fresh, if you haven’t developed a weird midlife love of garlic powder)
1 28-ounce can tomatoes, ideally San Marzano (crushed, puree, or whole and smashed up)
1 28-ounce can Hunts tomato sauce (or another plain, herb-free sauce of your choosing—or more of the tomatoes you’re using above)
1 6-ounce can tomato paste
1 tablespoon sugar
1 tablespoon balsamic vinegar (or ¼ cup red wine)
2 sprigs dried marjoram (or a pinch of oregano, if that’s how you roll)
(meat)
1 or 2 nice, fragrant bay leaves

Heat the oil in a Dutch oven over medium-low heat, and sauté the onion and celery with the salt until everything is translucent and tender, around ten minutes.

Add the granulated garlic, and stir for just a second, then add all the remaining ingredients and bring to a boil over medium-high heat.

Turn the heat to low, and simmer for as long as you can, covered, stirring occasionally. In a pinch, it can be ready in twenty minutes. But an hour is better—or stick it in your crock pot and forget about it for a while! Taste, and add more salt, sugar, or vinegar to brighten or balance the flavors.

Meat version
Sauté a pound of ground beef over high heat, until browning, then lower the heat and stir half of the sauce into it. (Or sauté two pounds of ground beef, and stir all of the sauce into it.) Simmer for 30 minutes or longer.


Friday, October 18, 2013

Brown Beef Stew, and some current favorite things

A quick update today, because I am flying around. And by "flying around," I mean staring out the window in a melancholy way as the leaves flutter to the ground.

Did I ever tell you about the time Anni burnt a large batch of paneer in this pot? No? Remind me. . . 
I posted Brown Beef Stew in my new archives here! Someone asked after it, so there it is in all its brownness and falling apart glory. I make that one all the time still.

And then a quick few recommendations:

This movie, The Crash Reel, although you have to know someone with HBO to be able to watch it. It's a documentary about the lovely young snow boarder Kevin Pearce, and his recovery from a traumatic brain injury, and it is one of the most moving and wonderful portrayals of family that I have ever seen.

This book, The Unknowns, by Gabriel Roth, which a) is not quite the usual kind of thing I recommend, b) full disclosure, was edited by a friend of mine, and c) is about an awkward computer programmer. It nonetheless utterly captured my heart and imagination and suffered only from being too short. It is a more or less perfect novel, as evidenced by this line: "'I see myself as a life-support system for feelings of anxiety,' I say. 'The anxiety is the organism and I'm the habitat.'"

This album, Southeastern, by Jason Isbell, who used to be in the band Drive By Truckers. Go to that amazon link and listen to the clip from song 12, "Relatively Easy." If you don't like it, you probably won't like the album.

This game, Love Letter, which is small, inexpensive, attractive, easy to learn, relatively quick, and like a cross between Hearts, Stratego, and a Jane Austen novel.

Have a wonderful weekend, my darlings.
xo

Friday, October 11, 2013

Lentil Soup with Garlicky Vinaigrette


I am continuing to plagiarism my own recipes, which I promise to start doing only intermittently rather than regularly, but this is the other one I seem most to be emailed about. Thousands of people a day write, begging for lentil soup.

Even though they should be concerned, given that this little tidbit was in our local police blotter. (Seriously. I mean, they shouldn't seriously be concerned. But this was seriously in the paper.)

Please do not tell my children that the police are a good resource for a domestic legume situation.
Take your chances. Here's the recipe, verbatim, from a couple of years ago. I make it nearly weekly, almost always in the Crock Pot.

I have the world's cheapest Crock Pot, but it has worked great for years.
Lentils, well, nobody's going to stand alongside the red carpet in screaming delirium when they appear. But they are such a staple around here that I can't believe I don't write about them every week.


I make a lentil salad, for instance, that is shockingly good, given its dun presentation; it's like some kind of a flavor geode, and you put a forkful in your mouth with low expectations and then--yowza. You're all aglitter with the deliciousness. ("Why is this so good?" people want to know and I say, "Stick of butter.") Likewise, this soup, which is deeply, brownly satisfying and then just the tiniest bit sparkly from the spoonful of garlicky vinaigrette you've drizzled over it.


That vinaigrette idea is a trick from this book--which, come to think of it, is where the lentil salad recipe is from, so maybe I'm officially recommending it. The soup itself is very basic but very good--the lentil soup I've been making, more or less, for the past million years. Sometimes I slip slices of garlicky sausage, kielbasa say, into it (Those were the days! It doesn't seem right to make a lentil soup that the vegetarian can't eat.); sometimes I add a couple of diced potatoes at the start; sometimes I stir in an entire bag of baby spinach right at the end.


Other than that, it's more or less the same. Except for the method, which changes based on the level of planning I've achieved. If I think to, I make it in the morning, set my slow cooker to low, and then spend my day abask in the crockpotty righteousness known only to invisible soup cookers.


If it's 5, and all the cabinets are open, and there's a giant question mark in a thought bubble over my head, then I make it the regular way, in a soup pot on the stovetop. And if it's 6:30, and the question mark is preceded by a starving "What the," then I make it in the pressure cooker, which takes just about half an hour start to finish (for pressure cooker people, I cook it at high pressure for 9 minutes, and then let the steam release naturally). Michael likes to tease me with that old Stephen Wright joke (For my birthday I got a humidifier and a de-humidifier... I put them in the same room and let them fight it out.) But hey, I'm a pressure cooker/slow cooker kind of girl.

Lentil Soup
Serves 6
Active time: 15 minutes; total time: 1 hour (conventional) or 3-6 hours (slow cooker)

This is a very forgiving recipe. If you don't have broth, use all water. If you're dying to get this into your crock pot and are already in your work clothes and you simply can't sauté the veggies first, then dump them all in raw. But make the vinaigrette, because it's that one detail that raises this from the depths of humdrum to the heights of moderately exciting.

2 tablespoons olive oil
1 onion, chopped
2 stalks celery, diced
2 carrots, diced
2 cloves garlic, finely chopped
2 teaspoons kosher salt
3/4 cup tomato sauce
2 cups lentils, rinsed and drained (I like to use the tiny green lentils de puy for this, but regular brown lentils are just fine too)
4 cups chicken or veggie broth (or more water)
2 cups water
1 bay leaf
1 sprig fresh thyme or 1/2 teaspoon dried
1 teaspoon balsamic or sherry vinegar

Vinaigrette
¼ cup olive oil
2 tablespoons balsamic or sherry vinegar
1 clove garlic, pressed
1/2 teaspoon salt

Slow cooker method:
Heat the olive oil in a wide pan and sauté the veggies with the salt over medium heat until they're limp and browning--around ten minutes. Add them to your slow cooker with all the remaining ingredients and cook on high for 3 hours, or on low for 6. Meanwhile, whisk together the vinaigrette ingredients. Taste the soup for salt, then serve with a drizzle of vinaigrette over each bowl.

Stovetop method:
Add the lentils to a soup pot with the broth, water, bay leaf, and thyme, and bring to a boil over high heat. Lower the heat, cover the pot, and simmer while you prepare the rest of the ingredients.

Heat the olive oil in a wide pan and sauté the veggies with the salt over medium heat until they're limp and browning--around ten minutes--then add the tomato sauce and vinegar. Scrape this mixture into the cooking lentils, stir, and simmer the soup over very low heat, partially covered, for an hour, stirring every now and again to keep it from sticking, and adding water if it looks like it’s drying out. When the lentils are nice and creamy, taste the soup for salt, then serve with a drizzle of vinaigrette over each bowl.

Friday, October 04, 2013

Mexican-style Brown Rice


 Today is my birthday, so I am offering two things.
Is one of the things an explanation of this weird photograph? No. Suffice it to say: we found that special item in the woods while we were camping, and our friend Jonathan defined the shape a bit with his knife, and it is called the Eegah hand. You have to stick it in your sleeve and stagger around with your arm hanging way long down by the ground, the Eegah hand almost dragging. Also, you have to say, "Eegah," in a groaning way. Did you never see this movie? It is really good.
One is this book recommendation: Alice McDermott’s Child of My Heart. My God. I just finished it, and it was so perfect that I forced myself to relax and savor it, the way I will do with pear Jelly Beans nibbling each one slowly because the flavor is so intense that you don’t need to swallow giant handfuls even though you're tempted to. Plus, since it’s 10 years old, you can probably pull it right off your library’s shelf, instead of adding your name to the bottom of some endless parchment scroll, like you will have to do for her new book, Someone, which is also utterly brilliant and wonderful. Or buy Child of My Heart here from Amazon for $1.58!
The other is my old Mexican Rice recipe, which seems to have been replaced online by someone’s else’s Mexican Rice recipe that has peas and corn and cumin in it. Mine does not. Mine is a little oily, a little salty, a little tomato-sweet. Whenever I make it, which is often, I eat tons and tons of it. Is that a good thing? Not really, I guess. Serve the rice with beans and cheese, or this pork, or roll it all up in tortillas, and everyone will be thrilled.

I am going to move all the recipes over here. In the meantime, look over there on the right! A recipe index of all the recipes that are here on the blog! Thank you for your patience with my Luddititude.

Mexican Rice
Serves 6
Active time: 15 minutes; total time 1 hour +

This is a cross between a Diane Kennedy recipe and a Rick Bayless recipe, and I love that it gets finished in the oven so you don't have to worry about burning it. The brown rice version is a little tricky, in terms of getting the liquid right, as different rices will do different things. If at 45 minutes it is not cooked and already seems dry, stir in another half cup of broth before returning it to the oven.

2 cups canned tomatoes (my favorite thing to use is Hunt's sauce, but plain old diced, crushed, or whole tomatoes work fine too--just don't use a very seasoned sauce or one that is Italianly flecked with oregano or anything; homemade salsa would work great, though)
1/2 an onion, coarsely chopped
2 garlic cloves, peeled
1 1/2 teaspoons kosher salt (or half as much table salt)
1 scant tablespoon pickled jalapenos (optional)
3 tablespoons olive oil
2 cups brown rice (I used short grain)
2 1/2 cups chicken or vegetable broth (I love Rapunzel veggie bouillon with sea salt and NO herbs)

Heat the oven to 350.

Put the tomatoes, onion, garlic, salt, and optional jalapenos in a blender, puree, and set aside.

Heat the oil over medium heat in an oven-proof pot with a tight-fitting lid. Add the rice and fry, stirring, until the rice gets nice and toasty looking and smelling, around 5 minutes.

Add the tomato mixture to the pot--it will sputter and sear--and cook another 2 or 3 minutes, stirring, until it reduces a bit.

Add the broth to the pot, bring it to a boil, and boil, stirring frequently, for 5 minutes.

Put the lid on the pot, pop it into the oven, and leave it there for 45 minutes. Now check on it: there will be a dimpled layer of tomato at the top, but when you fluff the rice with a fork and taste it, it should be just about done. If it is, take it out of the oven and leave it covered for 10 minutes to steam a bit more; if it's not, pop it back in the oven to cook and check it again at 5, 10, or 15 minutes depending on how not-done it was when you checked; when it's done, take it out and leave it covered for 10 minutes.

Fluff the rice with a fork and serve.

White rice variation:
To make this with white rice (I use Uncle Ben's but I can't remember why--maybe just to exaggerate the absence of nutrients?), proceed as directed, but reduce the broth to 1 1/2 cups, and omit the initial five minute boil: simply bring it all to a simmer and stir it, then cover the pot and pop it in the oven. Check it at 25 minutes, at which point it will likely be ready to come out and steam for 10.