Friday, September 27, 2013

Oily Smokey Roasted Peppers


Ben took this whole jar to school in his lunch box! With some kvass and a beautiful slice of liver-and-kidney pie.
One great thing about keeping a jar of roasted peppers in the fridge is that the kids just love them so much! Whether it’s the bitterness or the sliminess or the weird way they get stringy and slippery, with horrible little white seeds clinging to them like alien larvae, who can say. They just know they love them.

My friend Nicole brought me these beautiful paprika peppers from her garden. They are sweet and spicy and perfect for this, but regular bell peppers are grand too, I promise.
Okay, they don’t love them. Or like them. But unlike various of their historic dislikes (potatoes, say, or water, both of which one or another of my children has been disgusted by at some point), I kind of get it.

Maybe good children like roasted peppers.
In fact, I am still someone who might see a cooked square of green pepper in my bowl of minestrone and sigh.

Life is easy under the broiler.
Why roasted feels different to me from cooked, then, is somewhat mysterious. But these roasted peppers are sweet and meltingly tender, smoky and oily and tangy and hauntingly delicious. I love them. 

Do only people from immigrant families eat sardines? I wonder sometimes, because I feel alone in my love for them.
Plus, if you have a jar of roasted peppers in your fridge, then lunch is never far off: roasted peppers on toast with sardines; roasted peppers stirred into a can of oil-packed tuna with a handful of parsley; roasted peppers and a few slices of fresh mozzarella with a pile of Finn Crisps. If it weren’t for the kids, I’d say that you could toss some into pasta with a blob of ricotta and a few capers and call that dinner. But alas.

I asked Michael to do this so that I could "get a shot of it" and then I left the kitchen for the evening. Bait and switch alert! Although, skinning roast peppers is a job I find strangely satisfying. Like peeling strips of blistered sunburn off of your brother's back, say.
Oily Smokey Roasted Peppers
This is not an exact recipe. The idea here is to preserve the peppers (which are in season now, and abundant) using a three-pronged approach—salt, vinegar, and oil—that a) makes them taste great and b) allows them to keep for a long time. The seasonings are optional, of course, and/or could be varied, but the smoked paprika just ratchets up the smokiness in the perfect way, I find, so the peppers taste like you blackened them over a blazing hardwood fire instead of under the boring old broiler.

Any number of bell peppers or other peppers (I’ve been using paprika peppers.)
½ inch of white vinegar in a medium-sized bowl
½ cup olive oil
2 cloves garlic, smashed and peeled
1/2 teaspoon smoked paprika
Kosher salt (around 1 teaspoon per panful of peppers)

Cut the peppers in half lengthwise, slice out the stems, and pull out the seeds and veins. Arrange them on a foil-covered baking sheet, and pop them under the broiler until they are fully charred and wilting, 15 minutes or so.

Meanwhile, heat the oil for about 1 minute (via small stovetop pot or microwave) with the garlic and smoked paprika, and leave it to steep.

Dump the blackened peppers into a heatproof bowl, and cover them with the foil. Leave them to steam and cool for around 10 minutes.

Peel and rub off as much of the blackened skins as is easy. One at a time, dunk each peeled pepper half fully into the vinegar, then put each one in a bowl. When they’re all peeled and vinegared, toss the peppers with the salt, and pack them into a perfectly clean jar or glass container. Pour the remaining vinegar over them, then strain the oil over them, and refrigerate up to a month or two or three.

Thursday, September 19, 2013

The Big Picnic

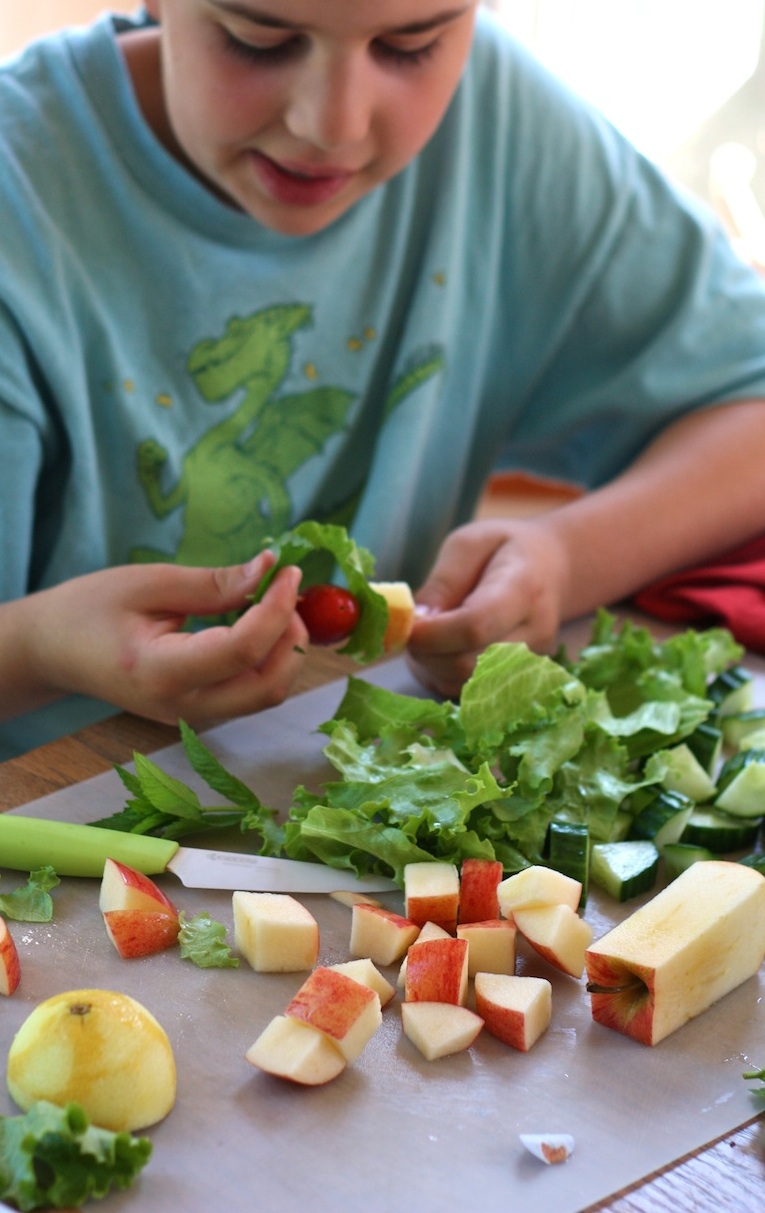
She picked out her ingredients unhesitatingly. That Birdy.
Kids cooking. Even just reading those two words, you're cringing, because you have toddlers still, or little kids, and it is impossible to let them "help" without everything taking a million years, and you've got a lock-jawed smile stretching your face, sparrows nesting in the white beard that's grown down to the ground in the time it took your child to measure 1/4 cup of flour. Plus, there's the other 15 3/4 cups of flour spilled out of the bag onto the counter and floor, and the cat is trotting through it, and you will find his floury paw prints all over the house for the next 17 months. I hear you.


But, and I always say this: it gets better. Invest now, deal with the mess and the endlessness with as much patience as you can muster, because one day. . . Oh, one day your kids will be cooking for you, and you will lie around on the couch with the New Yorker while they make dinner, dreaming up your brilliant cartoon captions and dispensing occasional cheerful nuggets of advice, as required. "Pomegranate and mint?" you will say. "Yes, that sounds like a lovely way to glaze the tofu." (That is a transcription of a real conversation that took place while Ben and Ava were cooking dinner a couple of months ago.) "The rice cooker? It's where it always is."  Even the cat is relaxing in your lap because there is no flour everywhere to tromp ecstatically through.
The Minted Pomegranate Tofu meal. They "finished" the sauce with a bit of butter. I know!
As you know, ChopChop, the non-profit family cooking magazine that I edit, is all about teaching kids to cook--and our mission there is not about parental laziness (like mine is here) but about childhood obesity. Study after study links from-scratch home cooking with healthy weight. And we believe that kids are going to have to lead the way--which means getting them excited about learning to cook. To that end, and to draw attention to the important issues at stake during National Childhood Obesity Awareness month, we're hosting something we're calling The Big Picnic: really, an opportunity to post and share photographs of your family cooking and/or eating together. It's this Sunday.
Our art director designed this snazzy badge! 
Tweeting, Google+ing, hashtagging, there are many vehicles for this sharing, and they're outlined here. There are also loads of recipes over there for inspiration, including one that I developed for Greek Salad Kabobs.
An early kabob prototype. You gotta love the banana.
That's what I'm "bringing" to the picnic. Although what I'm really "bringing" is Birdy's version that she made for a party, because it illustrates one of the fundamentals of teaching your kids to cook--and to love doing it--which is this. Lean in close. You have to give them room to make decisions and, maybe, fail, even if they are not making decisions that you would make or failures that are convenient. I know! It's terrible. At my house, this has involved deciding at the last minute to cook a green salad ("Wow, it's really really small now! Also very cooked tasting. I wouldn't do that again!"), experimenting with many dubious choices around salad-dressing concoction (cough *banana yogurt* cough), and threading fuzzy, choky lemon-balm leaves onto kabobs for a party.

The thing is? It doesn't really matter if I think that lettuce and apples and mint leaves are a real dream-boat kabob combo. Besides the fact that I'm often wrong anyway! (My own personal dream kabob would be, scallops and avocado and French fries, if you were thinking about my birthday and how it's coming up.)

But that was Birdy's vision. And you know what? They were magnificent. On a bed of hand-torn lettuce. With a dubious-but-delightful yogurt-based dressing as a dip. And they were gobbled up by grown-ups and children alike (with only one guest commenting about itchy lips). Birdy was thrilled. To quote Harvey Milk, my favorite politician of all time, "You gotta give them hope."

Please, post a photo on Sunday, hashtag it BigPicnic, and know that we're changing the world one mess cooked salad lemon-balm leaf bite at a time.

Wednesday, September 11, 2013

Plum Cake Redux


Does this look strangely unplummy? The plums are under there. They just sink a little.
Our cat-poop tree has finally decided to bear fruit.


This is a scrubby little diseased tree out front that has, in the 5 years we've lived here, only ever borne masses of turd-like fungus clumps and, occasionally, a single sad plum.

Where are all the cat poops? Oh, don't worry. There are still plenty.
Only this year it is laden. Or was, until we harvested every last plum--over 10 pounds in all. Mostly, I made jam.

But I was asked to save enough to make "at least two" plum cakes, and so I have.


This is a favorite, this recipe: "a dense, buttery cake dotted with sweet-tart plums that have gone silky in the oven." I'm quoting myself from 2008. It's is the first-ever recipe I ran, after I switched from gossiping about the children and their annoying habits of speech and mind, to gossiping about the strange and sometimes delicious ways that I choose to feed them.

I'm running it again because, well, it's not just that I'm trying to get all my old recipes over here, although that's part of it. But also because I've slipped a little wholegrain flour in this time around. You will love it. You will.

Plum Cake Redux
(adapted from the Original Plum Torte recipe published in the New York Times some time in the late 17th century)

The original NYT recipe calls for neither vanilla nor almond extract, but it asks you to sprinkle a teaspoon of cinnamon over the cake before baking, which I did for years, until I discovered that I wasn’t that crazy about the cinnamon. Did you make it in 2008, when I first ran it? Make it again with me, and swap in a little bit of spelt. Just a liiiiitttle of the whole-grain action. It is even better this way, I swear. Note: this is Ben's favorite cake of all the cakes.

1 stick butter (I use salted), softened
¾ cup sugar (plus 1 teaspoon)
2 eggs
1 teaspoon vanilla
½ teaspoon almond extract
2/3 cup white flour
1/3 cup spelt flour
1 teaspoon baking powder
¼ teaspoon kosher salt
12 plums (more or less), halved and pitted
Whipped cream or vanilla ice cream for serving (optional)

Heat the oven to 350.

Use an electric mixer (if you have one) to cream together the butter and sugar—or do this all by hand, which is fine. Now add the eggs, one at a time, beating well after each, and add the extracts too. Beat in the flours, which you’ve either sifted or whisked together with the baking powder and salt, and mix until the batter is well combined.

Now scrape the very stiff batter into your pan: I use a spring form pan that seems to be 9 ½ inches across, but you could butter and flour a regular cake pan and use that, need be. Use a rubber spatula to even it out; it will make a very shallow layer, and that’s fine.

Arrange the plum halves skin-side-up in a fancy concentric pattern around the cake. Or else willy-nilly, if you prefer. You will be tempted to put the cut side up because it looks prettier that way—but don’t. You want all that lovely plum flesh to bake its juicy way right into your cake. Now sprinkle the cake with a teaspoon of sugar and pop it in the oven to bake until it looks nice and brown and doesn’t jiggle anywhere when you, uh, jiggle it—the recipe says an hour, but mine is always done after 40 or 45 minutes; if your pan is smaller (and your batter therefore deeper) it may take a bit longer.

Serve with whipped cream or vanilla ice cream. 

Friday, September 06, 2013

Bride of Poop

A rare out-take/prop malfunction.
Ben's latest is here. Even if you think you don't want to see a claymation movie about an interpoop romance, you really do. The falling-in-love montage alone is worth its weight in. . .  well, you know.

And in case you missed the earlier films:
Poop gets his wings in this one.
And the origin story is here.

Happy weekend, my darlings.
xo

p.s. It bears repeating that Unbored is a wonderful book, and the place where the kids really got a foot in the door to the mechanics of animation. Just one of many, many things that book inspired them to try and do, including the hacking of Candyland into an actual strategy game that doesn't make you want to saw your own wrists apart with the Plumpy card.

Wednesday, September 04, 2013

Zucchini Soup with Corn, Cilantro, and Mint


School has barely started and already, come dinnertime, I'm stumped. We're still getting such fresh, summery things from our farm share: zucchini and corn, peppers and herbs and tomatoes. But I'm not really in a corn-on-the-cob mood anymore, you know? But this soup came together quickly, used a lot of what I needed to use, and was a surprise smash hit: fragrant and flavorful, studded with sweet corn kernels and crunchy corn tortilla strips. The children, who are wild about neither soup nor summer squash, both helped themselves to seconds. I've said it before, but I'll say it again: garnishes. That's the key to happy soup eating. 

Zucchini Soup with Corn, Cilantro, and Mint
This is fairly loosely adapted from—wait for it—Local Flavors! I know. Come September, I’m obsessed with that book. I added the corn and jalapeno, and skipped some roasted Poblanos and a blended-in tortilla. Maybe I was trying subconsciously to make it taste like this pasta? Also, and this may sound odd, I served it neither cold nor hot (both of which are officially recommended) but at room temperature, which I’m recommending here. It was perfect that way: dinner-like and not coldly off-putting, but not too hot on a still-warm evening. (Note: Did you get a corn zipper, like I told you? I'm going to keep mentioning it until you do. You'll see.)

3 tablespoons olive oil
1 large onion, diced
3 or 4 medium-sized zucchini, diced
1 small bunch cilantro, washed well and slivered (including stems)
1 fresh jalapeno pepper, sliced (optional)
1 garlic clove, smashed and peeled
3 tablespoons chopped parsley (if you didn't have this, it would not be a tragedy)
2 tablespoon chopped fresh mint
2 teaspoons kosher salt (or half as much table salt)
5 cups water or chicken or veggie broth (I used water and one excellent veggie bouillon cube)
1 corn tortilla, halved and then cut into skinny strips (use scissors!)
3 ears of corn, kernels shaved off (or 2 or 3 cups good frozen corn)
Lime wedges, sour cream, and cilantro leaves for serving

1.     In a large soup pot, heat 2 tablespoons of the oil over medium-high heat, and sauté the onion, zukes, cilantro, jalapeno, garlic, parsley and mint for ten or so minutes, stirring frequently, until everything is nice and limp and soft.
2.     Add the water or broth and salt (use less salt if your broth is very salty), bring it to a boil, then simmer, uncovered, until the zucchini is completely soft—around 10 or 15 minutes. Turn the heat off and leave the soup to cool.
3.     Meanwhile, heat the remaining tablespoon of oil in a small pan and fry the tortilla strips over medium heat until crisp. (If you wanted to just swap some tortilla chip crumbs here, I don’t see why you couldn’t.)
4.     Remove them to a bowl and, in the same pan and oil, sauté the corn over medium heat until just tender—3 minutes.
5.     Puree the cooled soup until smooth. I used a stick blender, but you could use a regular blender if that’s what you have. Stir the corn into the soup, and taste for salt.
6.     Serve the soup hot, cold, or lukewarm, garnished with tortilla strips, sour cream, and cilantro, with a wedge of lime on the side.

Monday, August 26, 2013

Savory Corn Pudding


School starts in two days, and I’m too catatonically depressed to say much. But: this was a fantastic dinner! It was all I could do not to make my usual favorite late-summer corn dish, but I’m glad I tried something new. The pudding is delicious: like an herby, cheesey corn-filled soufflé.


The corn stays sweet and burstingly juicy, plus, the whole thing is so cheap and easy to make, and you could add any herbs you like (cilantro would be good, and so would basil).


I’m adding the arugula salad recipe, not because you couldn’t figure it out on your own, but because it really is so simple and delicious. Kind of like another salad, I’m realizing.


Savory Corn Pudding
Serves 4 to 6

This recipe is adapted from Deborah Madison’s absolutely beautiful, useful book Local Flavors—a book I turn to constantly at this time of year, when I often have lots of this or that particular, fresh vegetable, without a clear sense of how it’s going to become dinner. She always helps it become dinner. I have mentioned this before, but I can’t say enough good things about the corn zipper, which has turned a job I used to hate (stripping kernels from cob) into one that I almost kind of like.

1 ½ tablespoons butter
1 onion, diced
6 ears sweet corn, cut from the cob (3 cups or so of kernels. DM also has you scrape and reserve the “milk” from the cobs, and add this to the egg mixture, but I forgot.)
2 eggs, lightly beaten
1 cup cream, evaporated milk, or whole milk (I used cream)
1 cup grated or crumbled cheese (I used a sharp cheddar)
2 tablespoons chopped parsley
1 teaspoon chopped marjoram (or another herb of your liking)
1 1/2 teaspoons kosher salt (or half as much table salt)
Freshly ground pepper
Paprika

1.     Heat the oven to 350 and butter a 6-cup baking dish.
2.     Melt the butter in a skillet over low heat and sauté the onion until it’s soft and lightly colored, about 10 minutes.
3.     Now add the corn to the pan and sauté another minute or two, until it is just tender (DM has you boil it separately in water, I’m not sure why).
4.     Beat the cream into the eggs, then stir in the corn and onion, the cheese, the herbs, and the salt and pepper.
5.     Pour the mixture into the dish, shake a few dashes of paprika over the top, and bake until puffed and golden, around 45 minutes. Serve warm.

Perfect Arugula Salad
Serves 4

6-8 cups very fresh arugula, washed and torn
1 tablespoon butter
1/2 cup fresh (or frozen) breadcrumbs (Note: if you don’t have any, just put a slice or two of any kind of bread in the blender! But maybe don’t use the dusty cardboard-scented kind from a cardboard can, which will not be tasty here.)
Perfect vinaigrette (recipe follows)
2/3 cup freshly grated parmesan

Put the arugula in a large bowl.

Heat the butter in a smallish pan over medium heat and fry the breadcrumbs, stirring some, and then later more, until they are very brown and toasty, which will take longer than you might imagine (5 or so minutes). Set them aside in a bowl so that they don’t burn in the still-hot pan. Let them cool.

Toss the arugula with dressing to taste, then add the breadcrumbs and parmesan and toss again.


Perfect Vinaigrette
Makes 1 cup

1 clove garlic, minced or put through a garlic press
1/3 cup white-wine vinegar
2/3 cup olive oil
¼ teaspoon dried marjoram (or oregano, if you prefer)
2 teaspoons kosher salt (or half as much are you even paying attention?)
Pepper

Shake it up in a jar. Store it in the fridge. (This will make lots more than you need for the arugula.)

Tuesday, August 20, 2013

Better and Better

Nothing says wilderness like suit socks with flip flops.
Have I mentioned camping before?


What?! I have?!

Oh. You mean here? And here And here. And then here. And here. And here. Also here. Oh, and my favorite: here. And another one here

It might not be funny, but Michael pretending to kill us with a sledgehammer is kind of a hilarity-ensued staple around here.
Anyhoo. I have two new favorite things to do camping. 1) Admire other people's toddlers and babies as they scuttle past on the road, but from the campfire, where I am sitting with a beer in my hand and a pile of chips in my lap, because I never need to stand up ever again because the big children can build the fire and rig the tarp and start dinner and put on their own sunscreen and go to the bathroom by themselves and set up Chinese Checkers. Meanwhile I watch a pair of preschoolers argue about a package of Goldfish crackers and run into the road and soak themselves in the faucet and lie down in the muddy pine needles to cry about how wet they got in the faucet where they were soaking each other. "Keep at it!" I offer, unbidden, to harried parents around our loop. "It gets even better than this!"

It's not that I don't still worry about them drowning. But it does feel a little less imminent these days. Knock wood. Shit.

2) Reminisce with the children themselves. I have always been a profligate nostalgia-oozer, but now the kids have gotten roped into my woozy, sentimental shenanigans. Walking up to the bathroom with me (because I have to go! not because she needs me!), Birdy sighs happily and says, "How many times do you think we've done this walk together, Mama?" And I would answer "A million?" if my throat would open up for a second. Her hand in mine is firm and cool, her eyes steady and sparkling on my face, the whispery, fragrant pines and washed air blowing away all traces of whatever gunk can fog up the space between us. If I've ever been happier, and I don't say this lightly, I can't think when.

I hope you're enjoying the last gasp of summer. And if you've already breathed your last, and your kids are back at school, I hope you're enjoying that too.

xo

Thursday, August 08, 2013

Plum Popsicles


The circling of the wagons, for the umpteenth time. Thank you, so much. And please forgive me for not responding to the comments, all of which I read and treasured (except for, you know, the hateful ones). I got a little emotionally bogged down, and, also, we were somewhere (cough *my parents’* cough) with only dial-up internet access. I admit to being surprised that, in support of niceness, people would think to call my heartbreakingly kind and wonderful 10-year-old daughter a “snotty little bitch.” And, also, that it turns out we *should* be encouraging our kids to interact with leering strangers. Who knew? Okay. Letting it go. Breathing. . .  Thanks to a friend of mine, I was reminded of this piece I wrote when Birdy was two. She has always been herself, that kid.

Moving on to. . . Plum Popsicles!

And let me say this: if you are a little ho-hum about popsicles? As I typically have been? This recipe will change your life. These are absolutely the best popsicles I have ever tasted. They are fragrant, bursting with plummy flavor and plummy chunks, perfectly sweet-tart, tender-textured, and stunningly gorgeous.

These are the yogurty ones. Pretty, no?
Full disclosure, we only thought to make these because the plums we got were so, so good: red and juicy and full of flavor. (I cannot recommend red plums enough. The yellow-fleshed black ones I do not understand.) In fact the plums were so good that I could hardly bring myself to cook them. But it always seems, with a new cookbook, that you should follow exactly the first recipe you try, and I’m so glad we did.

If you're waiting for it at the Amherst library, I am *so* sorry! Almost done!
Fuller disclosure: I requested People’s Pops from our library because last year, on the High Line in New York, we bought and ate a sour cherry-plum pop from their cart. And I said, like the Sesame Street Jew Grouch I can be, “Three dollars for a popsicle? It better be good.” And it was. In fact, it was the best popsicle I had ever tasted. Until now.
The High Line, back when Birdy had long hair and my mum was almost as gorgeous as she is now.
Two more things: we made half Roasted Plum Popsicles and half Plum Yogurt & Tarragon Popsicles, and they are both fantastic.
Tarragon!
I’m only putting the plain one here because, beyond that, don’t you think you should get your hands on the book? I do! Next up we are trying Raspberry and Cream. Then Blackberry and Rose. Oh, and also Peach and Bourbon. And Peach and Jalapeno. And. . .

That was only one thing. The other is that I finally bought this popsicle mold, after keeping it unbought in my shopping cart on Amazon for so long that they actually changed the material of the lid from metal to plastic. I am overjoyed and only wish I'd sucked it up to buy it sooner. They are real popsicles, with real sticks, and the molds are BPA-free. Totally worth it.


Roasted Plum Popsicles
Makes 10 pops

This recipe is from the People’s Pops cookbook. We followed it to the letter, and the results were nothing short of spectacular. Plus, the recipe made the exact right amount of mixture, which I love.

1 ¼ pounds plums (about 12 small or 5 large), halved
1 cup simple syrup

Heat the oven to 350. Place the plums cut-side down on a cookie sheet, then roast until the skins and flesh have significantly softened, 20 to 40 minutes. [Our plums were so fragrant and beautiful, that we stopped at 20. Also, I lined my cookie sheet with foil and then parchment, because I wasn’t confident about its non-reactivity, and the recipe was not for Plum & Rust popsicles.]

Once the plums are cool enough to touch, removed and discard the pits, and whiz the plums, skins and all, in a food processor, though feel free to leave the puree somewhat chunky. You should have about 2 1/8 cups of puree.

Transfer the pureed plums to a measuring pitcher with a pouring pout and stir in the simple syrup. The mixture should be sweet yet slightly tart.

Pour the mixture into your ice pop molds, leaving a little bit of room at the top for the mixture to expand. Insert sticks and freeze until solid, 4 to 5 hours. Unmold and transfer to plastic bags for storage or serve at once.

Simple Syrup
Makes 1 cup

2/3 cup sugar
2/3 cup water

Combine the sugar and water in a small saucepan and bring to a simmer over medium-high heat, stirring until the sugar dissolves and the mixture is transparent. Turn off the heat and let it cool.

Wednesday, July 31, 2013

Birdy

Is it wrong, on a day when I publish an NYT Motherlode piece about what a badass Birdy is, to point out that she looks like a Monchichi?

"Wow," Ben just said, looking over my shoulder. "That really is kind of uncanny."
There's something a little bit off about the piece, and I can't figure it out. Maybe it's that it doesn't adequately convey the fact that Birdy is actually a really nice kid (due perhaps to the fact that I say she's not). It's a particular type of pleasing that she doesn't do, but I'm not sure I quite capture it. Either way: Love that kid.

p.s. Tis the season for purslane quesadillas! You know, in case you'd forgotten.

Tuesday, July 30, 2013

The Amazing Necktie Shirt!

Ben's hair is not getting any shorter, I can't help noticing. But he is rocking the necktie shirt, no?
Thank you for indulging me in my immodest blog-post titles. I know it's all "The Single Best Thing You Ever Ate!" and "What, Are You Kidding Me? If You Don't Make This Spelt, You're a-Gonna Die!" and "Read This Book or Drown in a Spreading Puddle of Your Own Regret!" And now this. But seriously? This is one amazing necktie shirt--not like those lame necktie shirts you've resigned yourself to! And anyway, it wasn't even my idea. We saw one years ago at a craft fair, and I copied it for Ben.
The Original Necktie Shirt
I've been planning to post a little how-to ever since. And now seems like the perfect time. It can be the Amazing Back-to-School Endless Summer Necktie Shirt!

You'll start with a simple trip to your closet or thrift shop, where you'll pick out a slightly oversized polo-style shirt and a silk necktie. It does not absolutely need to be silk--but the silk gets so soft and faded and lovely in the laundry that you'll be glad you bothered! Have your child put on the polo shirt, and knot the tie loosely around the collar. Make sure that your child will be able to remove the shirt and tie once it's sewn on! (Amazing as the shirt is, wearing it forever could still be kind of a drag.)
Why don't we just keep the shirt and tie separate? you are wondering. And I am suddenly not entirely sure. But I will say that Ben wears his necktie shirt all the time, and never once has worn a different polo shirt and tie combo. So.
The next step is to imagine an attractively stiff breeze. Pin the tie at a jaunty angle, like so.

Why don't we just leave the tie kind of more normal? Look, do you want to make this Amazing Necktie Shirt or not?
It's not showing up as well as I'd like, but can you see how the thick part of the tie is kind of folded up near the top? I find this to be an oddly crucial detail, aesthetics-wise. You don't need to go crazy pinning, unless you're meticulous. I am not meticulous.

Now you're going to sew it. It's not a lot of sewing, so you could totally do it by hand. And if you're doing it by machine, you already know what you're doing. (If you don't, I'm probably not the person to help you. But my friend Nicole is!)

Speaking of Nicole, she made me this pin cushion for my birthday, like, a hundred years ago.
I find it easiest to start at the bottom of the point and sew up one side of the tie, then stop near the knot, do a little back-stitching to secure, and then start again at the bottom to sew up the other side. Sew, I sew the 2 tie tails in 4 separate events, if you see what I'm saying.

My main goal here is not to get the shirt bunched up into the sewing machine so that I end up sewing the whole thing together, front to back, screaming the word fuck such that every time Ben puts on the shirt he has a vague, uncomfortable feeling that he can't place. I sewed this one uneventfully and did not curse once.
Three or four years ago, I posted a wanted ad on Craigslist that said, "I am looking for a sewing machine that is old and very heavy but not vintage. I'd like it to do as few things as possible and to have been made in Japan, Germany, Switzerland, or the United States. I can spend up to $200." It's been a mad love affair ever since.
Stop sewing an inch or so from the knot. And just kind of sew around the jauntily folded part so that the fold stays intact, like so.

This is not a very clarifying photograph.
Next, secure the back of the tie with two little rows of stitches, just so it doesn't slide around.
   
I'm not convinced that this step is entirely necessary. I think the tie on Ben's old tie shirt was inclined to ride up over the collar in the back, which was why I originally added this bit of security.          

That's it. The entire project, not including rummaging around for the shirt and tie, will take you about half an hour.
Amazing! 
If you make one, will you please, please, please send me a photograph?

xo