Friday, July 28, 2006


The Pimping Introduction

Hello! Is that you? Did you find me here? I'm so glad! If you're coming from babycenter, then please know how grateful I am for those fantastic years. Thank you.

(An unrelated aside: It's funny to be floating around out here in blogland, where I could, say, write the f word if I want to. I will save that particular thrill for a rainy day.)

So, I thought I would just mention some things about where else you might come find me, now the the gig is up over at babycenter. I will miss being there very much, as you probably know. I wrote "Bringing Up Ben and Birdy" for four years, and it is all archived here. All eighty katrillion entries of it. Holy moly.

My new column (please don't expect to be blown away by the newness, if you know what I'm saying, as there won't be any shortage of entries about impatience, Chex mix, and saggy boobs) is called Dalai Mama, and it's over at Wondertime. Please come visit me there. There may not be a comment section up yet, but there will be soon. Also, it's a little confusing, since there's the monthly column I write for the magazine, and then the weekly blog that you have to click on from the home page (wait for it to scroll past in that little scrolling box).

I've also been writing for the Oprah Magazine (more about the boobs coming soon!), and I always write a lot for FamilyFun, a magazine I love and that I'm shy to mention since it reveals the Polyanna-I-made-it-from-craft-foam-and-celery-salt side of my personality. But still.

There is the book, too. You know, that book, Waiting for Birdy, which decorum has kept me from begggggggging you to buy: but my god, please buy it. Pleeeease. Then I can bail Ben and Birdy out of prison when they're teenagers. Plus keep up my Chex mix habit.

And finally: do you need the best massage of your entire life and happen to live in Western Massachusetts? Or do you have a friend here who could use a gift certificate for a massage? Have I got the perfect, hunky, strong-but-gentle massage therapist for you! I'm not kidding you. This is a massage that will change your life, and then you can write to thank me for having been the crash-test massage dummy all these years so that you could get a great massage.

Okay, I've pimped my whole family out. Please be well. More soon.

Monday, July 24, 2006

More camping food! And a food-packing list.


High Camp

Eating is my favorite part of car camping, and I can tell you that I did not feel this way when we were young people backpacking our earnest way across the Sierras. Those were the days of freeze-dried something-or-other that was always rehydrating awkwardly in our bellies because we'd wolfed it down too soon and too fast. Those were the days of too much jerky, too little yumminess, no cold beer, and a dreaded implement we called "the dung trowel." What were we thinking?

Because now we are all about the good camping food--which doesn't mean we're always or ever especially fancy about it. In the ravenous fresh air, a hot dog browned and blistered on its stick is as good a meal as you're likely to eat anywhere. As is cheese melted stinkily on a log near the open fire and served with boiled potatoes and cornichons--our camper's version of the French dish raclette. We fry bacon on thick sheets of foil (crimp the edges up so the fat doesn't run off and catch fire), we roast potatoes and corn in the coals, we prepare various camp classics featuring the word "hobo" in their names, because what could be more enticing than the culinary output of penniless train-riding vagabonds?

We eat and eat, with a kind of righteous ravenousness born of the great outdoors: chips and salsa, crackers and cheddar, sandwiches of goat cheese, cucumbers, and fresh dill. In the mornings we sit with our muesli and our smoky fire-brewed espresso and watch the sun glittering on the pond through the trees. Under the stars, we pop corn and roast marshmallows and gaze sleepily into the flames. One year, on my husband's birthday, we even steamed lobsters in an enormous pot and ate them, dripping with butter, off of paper plates. And when it rains, there are always the clam shacks, where we stall over steamers and fried bellies and onion rings and wait for it to let up. But mostly we cook, and these three recipes here are the ones we return to over and over. If you eat them with a tent and a roaring fire and lots of gigantic clacking beetles nearby, they will be mind-bogglingly fantastic, but here's a secret: you could actually make them at home on your gas grill or in your fire place, and they'd still be good. Excellent, even.

Pie-iron Pizza
Hobo pies make a filling and delicious amusement: two pieces of buttered bread sandwich your favorite contents, then toast over the fire in a long-handled pie iron (Rome Industries, $20) to make the original, low-tech hot pocket. You can crimp any filling you like inside the crisp, delectable pies--cheese, marshmallows and Nutella, peanut butter and jelly, even tinned pie cherries--but this is our favorite:

Bread
Butter
1 small can tomato paste
Mozzarella, sliced
Favorite pizza toppings: olives, peppers, pepperoni (optional)

Butter a piece of bread, then spread the unbuttered side thickly with tomato paste before laying on the cheese and toppings. Top with another piece of buttered bread, press the sandwich into the pie iron, and toast it over the fire (ideally over hot coals), turning it from side to side, until the bread looks beautifully browned and the cheese is melted. Keep checking, and don't be dismayed if you burn the first one: it takes a while to get the hang of it, but persevere--it's so worth it.

(Variation: Chicken Parmesan Hobo Pies. On your way back from the beach, pick up a to-go order of chicken fingers from a clam shack or restaurant and sandwich them in with the tomato paste and cheese. This is the most decadent and delicious thing--a favorite of kids and grown-ups alike.)

One-pot Camp Couscous
I have been making this meal for twenty years (Twenty years! Because I am a thousand years old!), and my kids refer to it as "The Camp Dinner." You could do this over the fire, but I make it over the same teetering one-burner camp stove we've been using for decades. It's so easy and satisfying and wholesomely wonderful that the truth is I sometimes make it even when we're not camping.

Olive oil
1 onion, sliced or chopped
2 medium zucchini, quartered lengthwise then sliced
3/4 teaspoon kosher salt (or half as much table salt)
2 or 3 cloves of garlic, finely chopped
Optional spices (such as smoked paprika, cumin, or chipotles)
1 14-ounce can of beans, with their liquid (black and pinto are our favorites)
1 8-ounce can of tomato sauce (I use Hunt's)
1 cup of water
1 cup of couscous
1 or 2 cups sliced or shredded cheese (we use cheddar or Monterey jack)
A large handful of fresh cilantro or parsley, chopped
Hot sauce

Pour a large glug of the olive oil into a pot or skillet over medium heat, then sauté the onion until translucent and golden, about five minutes. Add the zucchini, salt, and garlic, and sauté another five minutes. Stir in the spices, beans, tomato sauce, and water, and bring to a boil. Stir in the couscous, then sprinkle or lay the cheese over the top, turn off the heat, and cover. Let the couscous sit for ten minutes, stirring once after five, then stir in the herbs and serve it in bowls with hot sauce for topping.

Packing List
A milk crate packed with:
  • Stove and fuel
  • Matches
  • Pot with lid
  • Cast iron frying pan
  • Wooden spoon, spatula, tongs
  • Can opener
  • Pie Iron
  • Metal espresso maker
  • Mini cutting board and knife
  • Half-pint jelly jars with lids (to drink from, measure in, hold bouquets, and store leftovers)
  • Metal or plastic plates and bowls
  • Paper plates (for when you can't bear to wash dishes)
  • Mugs
  • Forks, spoons, knives
  • Heavy-duty foil
  • Paper towels
  • Ziploc bags
  • Wash Basin
  • Sponge and eco-friendly dish liquid
  • Dish Towel
  • Trash bags
  • Oilcloth tablecloth
  • Candle for the table

A large plastic bin packed with:
  • 5-gallon jug of water
  • Coffee and tea
  • Sugar
  • Olive Oil
  • Salt
  • Smoked paprika and black pepper
  • Hot sauce
  • Oatmeal and granola
  • Marshmallows, graham crackers, and chocolate
  • Couscous (premeasured in a Ziploc bag)
  • Canned Beans
  • Canned tomato sauce and paste
  • Bread and buns
  • Peanut butter
  • Jam
  • Ketchup and mustard (if you forget, swipe a few packets from a restaurant)
  • Onions and garlic
  • Chips and salsa
  • Crackers

A cooler packed with ice and:
  • Cheese
  • Milk
  • Butter
  • Fruit, lemons
  • Veggies (cukes and zukes)
  • Fresh herbs
  • Eggs
  • Bacon
  • Hot dogs
  • Beer and Wine

Wednesday, March 22, 2006

Iced Oatmeal Cookies


Sometimes I can't believe that I have become this person--and I mean that in the best possible way. I fold their clean t-shirts and make their dentist appointments and read Farmer Boy and dig splinters out of their toes and kiss them when their school day is done, and I think, "These are my children! I am their mother!" Me. I mean, I am practically a child still myself--at least in my own mind. But I don't think the kids even think twice about it. I don't think they ever shake their skeptical heads and think, "We're onto you and the gappy way you inhabit your mom costume." They see me, and I am their mother, the one with the boobs that have been nursed down to the floor where they drag along righteously, the one with the morning smell and the busy work life and the good dinners on the table and the irritable loathing of loud noises and the affection that twinkles like a whole galaxy of stars lit up across the heavens just for them. The tax forms come, and that word "dependents" always puts a lump in my throat: my dependents! They are dependent on me. I am dependably theirs.


And as rushed and crazy as I can feel packing their lunchboxes (this morning, for instance, when I remembered at 7:40 that Ben had to be at school for recorder rehearsal at 7:45), I also kind of love it. It's like that horrible peanut butter commercial we saw during the Olympics, the one that made me cry, where the mom and daughter are in tears over the phone because boo hoo hoo the daughter is at college and boo hoo hoo the mom sent a jar of Jiff or Skippy or whatever and boo hoo hoo that's her favorite peanut butter and she's homesick. But still. I put a cookie in the lunchbox and it is, plainly and simply, an act of love, and I love to do it. (Of course, now I feel like I'm going to be quoted in some kind of dreadful conservative propaganda literature about how fulfilled mothers feel by mothering, and how right and proper it is, etc. And I'm not saying that at all, as you know, given that I work, like, a million jobs and could write a whole other column about how every day I think, similarly delighted, "I'm working! I can't believe I'm getting away with this!" And I could also write about the millions of times I thought to myself, "Brush your own damn teeth, you parasites!" But still.)


All of which is to say: this is a great lunchbox cookie, and a total "mom" cookie. In fact, Kim Boyce, whose recipe this is, actually compares them to the "Mothers" brand of iced oatmeal cookies--which is just too perfect, given their momliness. They are comfortingly spiced and wholesomely crunchy (thanks to oats and whole wheat flour), and then they've got this sweet and pretty drizzle of cinnamon icing that practically screams "I love you" from your kids' lunchbox. It's like those howler letters in Harry Potter, the kind you take it out of its envelope and it shouts and rants at you--only it's a cookie, and all it wants to say is, "You're mine."

Iced Oatmeal Cookies
Makes 3 dozen
Total time: 1 hour

This recipe is adapted from one of my favorite baking books, Good to the Grain: I use half whole wheat and half white flour (instead of her more complex but doubtless fabutastic whole-grain baking mix), and I make them a little smaller because, well, then there are more of them. If you make cookies often and don't have one of those spring-load scoops, I really recommend getting one; I've had mine for less than a year, and don't understand how I lived without it. Also, a nutmeg grater is a very small and worthwhile investment (unless you need this Peugeot one!).

2 cups rolled oats
1 cup whole wheat flour
1 cup white flour
1 tablespoon plus 1 teaspoon baking powder
1 teaspoon baking soda
2 teaspoons kosher salt
1 teaspoon cinnamon
1 teaspoon nutmeg (ideally freshly grated)
1 cup brown sugar
1/2 cup sugar
2 sticks unsalted butter, melted and slightly cooled (I actually used unsalted for these!)
2 eggs

Heat the oven to 350 and line 2 baking sheets with parchment.

In a food processor or blender, grind the oats to a coarse meal that still has some large flakes, around 10 seconds.

Sift together the flours, baking powder, baking soda, salt, and spices, then whisk in the sugars and the oats. Whisk together the butter and eggs, then use a rubber spatula to combine this mixture with the dry ingredients.

Use a cookie scoop or heaping tablespoon to scoop balls of dough onto the cookie sheet, leaving plenty of room for them to spread (I did 9 per sheet). Bake in the upper and lower third of the oven for around 14-17 minutes, reversing the sheets top to bottom and front to back halfway through. When they're done, the cookies should be evenly browned. Cool them on a rack and bake the remaining cookies.

When the cookies are all baked and cooled, use a fork or whisk to drizzle the icing over them, then let them set for half an hour before storing them airtight.

Icing

2 1/4 cups powdered sugar
5 to 6 tablespoons whole milk
1 tablespoon cinnamon
¼ teaspoon kosher salt

Whisk together all the ingredients: the icing should be smooth and the drizzling consistency of honey; add more milk or powdered sugar to achieve this. 

Thursday, February 09, 2006

Whole-Wheat Chocolate Chip Cookies


These cookies are from Kim Boyce's wildly inspiring cookbook Good to the Grain, and they are made with, um, 100% whole-wheat flour. That's right. 100%.

And they are just insanely delicious. "Well they should be," my friend Peggy said, reading over my shoulder. "Look at all that butter and sugar and chocolate!" Exactly. But here's how I think about it: butter and sugar are like escorts. If what they're escorting into your body is white flour, then okay, it's a total treat, and just have a little and don't worry about it. But if they're actually escorting nutrients? Like here, in the form of all those lovely B vitamins and fiber and essential fatty acids from the bran- and germ-rich whole-wheat? Then, for me, this is a nutritional red carpet situation, everybody glittering and wearing their designer dresses, the butter and sugar standing back while the paparazzi snap pictures.

I don't mean I'm going to serve the cookies for dinner (please, please let me not ever serve them for dinner). I just mean they've got a lot to offer. Rather than cookies that, say, don't have much butter and sugar--but also don't have much of anything good. I would consider adding nuts and dried fruits to up the nutrient quotient even further. And quinoa flakes! Amaranth dust! Just kidding. (I think.)

Okay. Sorry for the whole foods rant. I am--Can you tell?--figuring out about food as I go. But make these anyway because they're so crunchy and chewy, and the whole wheat gives them such a deep, nutty flavor. They are our go-to lunchbox cookies.


Whole-Wheat Chocolate Chip Cookies
Makes 30
Total time: 45 minutes

In her introduction, Kim Boyce writes: "These cookies are the size of your palm, with thick, chewy edges, soft centers, and big chocolate chunks. It's surprising just how delicious this whole-wheat version of an old classic is." Ditto from me. I am transcribing this recipe almost verbatim; I didn't change a thing. Except for using salted butter without decreasing the amount of salt called for. Which I recommend doing (of course).

Dry mix:
3 cups whole-wheat flour
1 1/2 teaspoons baking powder
1 teaspoon baking soda
1 1/2 teaspoons kosher salt (or half as much table salt)

Wet mix:
8 ounces (2 sticks) cold butter (I used salted), cut into half-inch pieces
1 cup brown sugar
1 cup sugar
2 eggs
2 teaspoons vanilla
8 ounces bittersweet chocolate, roughly chopped into 1/4- and 1/2-inch pieces (mine was semisweet; I imagine you could just use chocolate chips and it would be fine)

Place 2 racks in the upper and lower thirds of the oven and heat it to 350. Line 2 baking sheets with parchment.

Whisk the dry ingredients together in a large bowl.

Add the butter and sugars to the bowl of a standing mixer fitted with the paddle attachment. With the mixer on low speed, mix just until the butter and sugars are blended, about 2 minutes. Use a spatula to scrape down the sides of the bowl. Add the eggs one at a time, mixing until each is combined. Mix in the vanilla. Add the flour mixture to the bowl and blend on low speed until the flour is barely combined, about 30 seconds. Scrape down the sides and bottom of the bowl, then add the chocolate and mix on low speed until combined.

Scoop mounds of dough about 3 tablespoons in size (I used a scant 1/4-cup as a measure), leaving 3 inches between them. They spread a lot.

Bake the cookies for 16 to 20 minutes, rotating the sheets top to bottom and back to front halfway through, until the cookies are evenly dark brown. Transfer the cookies, still on the parchment, to the counter to cool. Eat warm or, ideally, no later than later the same day--though they're good for a couple of days.

Saturday, December 10, 2005

Peppermint Patties


Bar Bark. This is what I was imagining when I was hungrily lying in bed last night: a candy bark that would be the usual layer of chocolate, but then covered with every conceivable kind of salty bar snack--peanuts and corn nuts, wasabi peas, pretzels and goldfish crackers and Chex mix, even Fritos and barbeque potato chips. How fantastic would that be? I actually think I'm going to try making some with just barbeque potato chips. And maybe also corn nuts. And Fritos.
 
But, somehow, that just doesn't seem like the right thing to give the teachers at the kids' school: here's this superfreaky chocolate weirdness that goes really well with a nice big pint of beer! 

 
Anyways: peppermint patties, which have been our go-to holiday treat on and off for years. I love making them because they have that nearly magical "we made these?" quality of being the most excellent version of a thing that is already so beloved even in its store-bought state. Plus, if I can speak plainly, they're really inexpensive to make--especially if you already have the peppermint extract. If you don't already have the extract, it's worth buying because sometimes you might want to put a few drops in your hot chocolate or your hot fudge. Or maybe you want to make candy canes! Not that I've ever made candy canes, given that it looks like it takes forever and results in a not-as-good-as-storebought version of something I don't like to begin with. (But feel free to prove me wrong! Send me your homemade candy canes in the mail, and I will post here about the debunking of my foolish beliefs.)

 
Once you've made your peppermint patties, there's the issue of presentation. A lot of the dramatic oomph of homemade treats comes, and I'm sorry to sound so shallow, in the way they're packaged. In an old shoebox with wads of used tissue paper, they're just not going to delight the same way they will if you splurge on the take-out containers from Michael's (or, if you're smart and plan ahead, from the take-out supply company, where it's $5 for fifty of them) and decorate them with nice labels or stickers and string or ribbons. I've also had good luck packaging them in clear candy bags with decorated cardstock tags stapled across the top. I bet you could even stack up a row of them and wrap them in colorful tissue paper to look like a Christmas cracker--the kind that pops open to reveal a toy, not, like, a red and green Saltine--and that would be festive and inexpensive. Silver-paper wrappers would be nice too, of course, and could evoke that whole York "get the sensation" sensation you had when the commercials game on in the middle of the Charlie Brown Christmas Special you were watching.

 
Let me know if you have other thoughts on these. When I was working on this recipe for FamilyFun (it's in the November issue, along with a bunch of other awesome gifts you can make), it was July, and honestly--the thought of Christmas was almost nauseating. I had to have a fan blowing in the kitchen so they wouldn't melt while I was making them, and then I had to go to the Christmas Tree Shop to brainstorm various holiday wrapping ideas. Who goes to the Christmas Tree Shop in July? Well, lots of people, it turns out, not just people on funky off-season magazine deadlines. Who knew?


Peppermint Patties
Makes about 3 dozen
Active time: 45 minutes; total time: 1 1/2 hours
These are the addictive classics with a snappy, minted middle dunked in deep chocolate. Packaged by the dozen in Chinese take-out boxes, they make perfect no-cook gifts--but first you should whip up a test batch for yourself just to make sure they're really, really good.

1 1-pound box confectioners' sugar
1 tablespoon shortening
2 tablespoons plus 1 teaspoon water
1 tablespoon light corn syrup
1 teaspoon fresh lemon juice
3/4 teaspoon peppermint extract
10 ounces semisweet or bittersweet chocolate chips
6 Starlight mints, unwrapped and crushed in a Ziploc with a rolling pin (optional)

Sift the confectioners' sugar into the bowl of a standing electric mixer and beat in the shortening on medium speed. In a small bowl stir together the water, corn syrup, lemon juice, and extract, then beat it into the sugar mixture until combined.

Knead the mixture into a ball (it will be very stiff), then use the bottom of a glass pie plate and firm, even pressure to flatten the ball between sheets of wax paper into a 9-inch disk that's about 1/4 inch thick (if you try doing this with a rolling pin, you will be much more frustrated, I assure you). Place the disk (with the wax paper) on a cookie sheet and freeze until firm, around 15 minutes.

Place the frozen disk on a cutting surface, remove and reserve the wax paper, and cover the cookie sheet with parchment. Use a 1-inch round cutter to cut out patties, moving them to the parchment as they're cut. Gather the scraps into a ball, use the pie plate and wax paper to flatten it again, and cut more rounds until all of the filling is used. Freeze the rounds for 10 minutes.

Meanwhile, melt the chocolate in the top of a double boiler over barely simmering water. Coat the patties one at a time, balancing each on a fork and dipping (use another fork as needed to flip the patty in the chocolate), then shaking excess chocolate and scraping the bottom of the fork against the edge of the bowl before returning the coated patty to the parchment. Make a ridged pattern one each patty by pressing a fork into the chocolate and lifting it straight up. Reheat the chocolate as necessary until all the patties are coated, then allow them to sit until set, about 1 hour. Optional: sprinkle patties, as they're coated, with the crushed mints.

Peppermint patties keep, layered between sheets of wax paper in an airtight container and chilled, 1 month.

Grapefruit Marmalade


Thank goodness for easy, homemade holiday gift recipes! You’ve got some, right? Because this isn’t actually one of them. In fact, this is almost bizarrely time-consuming and fiddly. So why would you make it? Well. I’ll tell you. If you get in the right mood, it will actually be one of the loveliest couple of hours you’ve ever spent. You’ll get your kids in on the zesting of the fruit, for one thing, and your home will fill with the unutterably delightful fragrance of citrus. (It’s grapefruits, for heaven’s sake! It’s not like I’ve got you shucking clams or stuffing cabbage.) Plus, you’ll put some holiday music on (Try the Christmas station on Pandora!) and you’ll feel relaxed and happy knowing that, at the end of this afternoon of peeling and cutting and measuring and boiling, you will have jars and jars of gorgeous, glowing marmalade. And if it’s not on the top of everyone’s wish list this year—well, next year it will be, so I hope you enjoy making it. Because you’ll be making it again, I guarantee it. (When I threatened not to make it this year, my father sighed and said, “But what will we eat with our New Year’s Eve paté?” Okay, okay.)


Note: If you have never canned anything before, don’t feel pressured to start now. Do this instead: make sure your jars and lids are scrupulously clean by running them through the dishwasher and filling them while they’re still hot. And then you can simply refrigerate the marmalade until you’re ready to give it. It’s not crazy-perishable or anything: it would definitely do fine in the car on the way to, say, Buffalo.


Grapefruit Marmalade
Yield: 8 (or so) half-pint jars

Ingredients
2 large grapefruits (about 2 pounds total) organic ideally, and scrubbed well and dried
4 large lemons, organic ideally, and scrubbed well and dried
7 ½ cups water
5 cups sugar
¾ cup honey

Special Gear
A cutting board that doesn’t smell like onions
Clean cheesecloth and kitchen twine
8 half-pint canning jars with lids

Instructions
1.     Start by laying a large square of cheesecloth on your work surface. Everything you would typically toss in the trash or compost is going to go on the cheesecloth. Make sure your jars are clean; get them boiling if you’re doing the full-on canning. Put a clean saucer in the freezer. Put a pompom in the cat’s water bowl. (You can skip the last step: he’s already done it himself!)

2.     Supreme the grapefruit. Do you know what that means? It means slice off the top and bottom, then lay it on a now-flat end, and cut down all around the outside of the grapefruit to remove the peel and expose the flesh. Deal with the flesh first: cut the segments free from the membranes, chop them roughly, and put them in a large, non-reactive pot. Squeeze the juice from the membranes over the pot, then add the membranes to the cheese cloth, along with any seeds you may have come upon. Now deal with the peel (along with the top and bottom you cut off): cut and scrape as much of the pith (the white part) from the rind (the colored part) as you can. Add the pith—you guessed it!—to the cheesecloth and use a sharp knife to shred the peel finely (I stack it up and cut across it to make super-skinny shreds). Add the peel to the pot.

3.     Onto the lemons. Use a very sharp peeler to removed the rind (a great job for a child who won’t peel his fingers in the process!) then stack and sliver the rind with a sharp knife. Add it to the pot. Now supreme the lemon like you did the grapefruits, adding the roughly chopped flesh to the pot and adding the pith, seeds, and membranes to the cheesecloth.

4.     Pour yourself a glass of wine, because the hardest part is behind you now.

5.     Pull the corners of the cheesecloth together, and tie this bag up with a length of twine. Add the bag to the pot, along with the water, bring it to a boil over high heat, then lower the heat to low, and simmer for an hour to an hour and a half, stirring occasionally just to check in on it, until the peel is tender and there’s about half of what you started with left in the pot. Remove the cheesecloth bag to a strainer, and use a wooden spoon to press and mash it and extract all the juice you can back into the pot. Discard the bag, or compost its contents. If you need to, you can cover the pot and stop now for a couple of hours, then resume a bit later.

6.     Over low heat, stir the sugar and the honey into the marmalade until it’s dissolved, then turn the heat to high and bring the marmalade to a boil. Boil hard for 10-20 minutes until the setting point is reached. This means that when you pour a spoonful of it on the frozen plate and return it to the freezer for a moment, it will seem a little gelled and wrinkly when you push it with your finger, rather than running right off the tilted plate in a liquidy way. If it’s not done when you first check it, check it every five minutes until it is. But don’t wait for it to seem completely set, or it will set up too thick when it cools. A little loose is fine.

7.     Turn the heat off and use a large metal spoon to skim any scum that’s formed. (“Throw away” the scum, by which I mean eat it when nobody’s looking.) Let the marmalade stand, off the heat, for 15 minutes, then ladle it into the prepared jars and seal them. If you are actually canning it, and are new to canning, consult a site like the Ball one: www.freshpreserving.com.

8.     Allow the marmalade to cool overnight. Then prepare to be adored.

Monday, November 21, 2005

Latkes


And then there's Hanukkah: Michael's grandmother's menorah, lit with great sentiment and ceremony--and only slight fumbling over the prayers and their difficult tune--every night. I just looked it up on Wikipedia to read that "the Festival of Lights, is an eight-day Jewish holiday commemorating the rededication of the Holy Temple in Jerusalem at the time of the Maccabean Revolt of the 2nd century BCE." Oh! I always explain it to the kids as a kind of loaves-and-fishes situation: a day's worth of oil burns for eight; through faith and gratitude, something expands to become enough. That so perfectly describes how I want to live that it takes my breath away. An attitude of abundance. The miracle of gratitude.

And yes, I'm perfectly happy to sit in the candle-lit house of our friends, who've recently become pig farmers, and eat latkes fried in lard. Because this is part of our belief too: not just pig fat (which could be a religion unto itself), but the spirit of resourcefulness, an absence of waste, food shared in happy community with ceremony and warmth and absurdity and laughter.

But that's not the recipe I'm giving you. Not just because the treyf quotient is detonatingly high (even my late atheist grandmother had to be cringing a little over the "lardkes," as we called them), but also because, well, canola oil is really a more practical option. I also make a mess-free and greaseless oven-baked potato-pancake recipe, but it's wrong to make them that way when what we're celebrating is oil--it feels too much like fretting about the carbs in your Eucharist wafer.
 
Make these, even if you're not Jewish, and eat them in quiet appreciation of their deliciousness or accompanied by the Hanukkah story of magic oil, of spiritual illumination, of the light of human kindness shining through these dark and holy nights.
 
Latkes
serves 4 as a meal, 8 as appetizers
Total time: 45 minutes

These are crispy and tender and salty and delicious. A pinch of baking soda keeps the potatoes from turning their creepy blue-grey color; whirring the batter in the blender makes it smooth enough to spread thin and cook through quickly; small pancakes maximize crisp edges.

3 fist-size baking potatoes or Yukon golds, peeled (enough to make 3 cups grated)
1/2 a small onion
2 eggs, lightly beaten
1/4 cup flour
1/8 teaspoon baking soda
1 teaspoon kosher salt (or half as much table salt)
1/2 cup (or so) vegetable oil
Sour cream and applesauce for serving

Grate the potatoes and onion: I do this with the grating disk of my food processor, but it's fine to do it on the large holes of a hand-held grater. Stir in the eggs, flour, baking soda, and salt, then pulse the mixture briefly in the food processor, now fitted with the steel blade. If you didn't use the food processor to begin with, then your potatoes were probably more mushily grated (in a good way), and you can skip this step--or else whir the mixture briefly in a blender.

Heat 1/4 cup of the oil in a large, non-stick frying pan over medium-high heat, then drop in heaping teaspoons of the batter and flatten them a bit with the back of the spoon. Fry the latkes until they're nicely browned, then flip them and fry another 2 minutes until the undersides are browned too. Drain them on a paper-towel-covered wire rack and, if absolutely necessary, keep them warm (sans paper towel) in a 250 oven until they're all fried. But it's really better just to take turns frying and eat them while they're fresh and hot. Sprinkle with salt, and serve with sour cream and applesauce.

Bonus Applesauce Recipe
I make applesauce two different ways: if I'm lazy, I just chop up the apples, cores skins and all, and cook them until their tender, then put them through a food mill to fish out the skins and seeds and make a smooth sauce; if I peel and core them first, then I leave the sauce chunky.

Apples (I used 6)
Water
Maple Syrup (I used around 3 tablespoons)

Chop the apples and add them to a medium-sized pot with a splash of water. Simmer them on low heat, covered, stirring occasionally, until they are tender (from 15-30 minutes), then stir in maple syrup to taste, and put the sauce through a food mill (or don't).

Sunday, November 20, 2005

Holiday Crudités with the best-ever Green Dip


This is my gift to you this Thanksgiving—the gift of your not cramming your pie hole with baked brie and grape-jelly meatballs right before you sit down eat the biggest meal of the year complete with a bucket of gravy, a basket of Aunt Willetta’s dinner rolls, and so many variations on the theme of glucose-in-a-crust that you have a sudden epiphany about pi, and how it goes on and on, forever and ever, or at least until you fall asleep on the couch with a small plate still balanced on your knees. As our friend Megan used to say after the turkey and stuffing every year, “I’m doing a juice fast until the pies come out.”
 
So, here’s this: a way to start the meal on a lovely, light note; a way to be sure that you won’t be stuffed before you even begin; a way to give your kids lots of pleasant little jobs while they’re milling around; a way to get a few veggies into your kids nice and early, while they’re hungrily milling around; and a way to forget about serving salad with dinner because you’re going to forget about serving it anyways. I can’t tell you how many Thanksgivings we wobbled late to the fridge to look for another bottle of wine—only to see in there the poor, forgotten salad still covered in a damp dish towel. Nobody wants salad after pie. Not even Michael’s brother Keith, who is famous in our house for once hiding an entire quart of gravy during the meal so there would be plenty for his leftovers the next morning. “I could have sworn there was more gravy,” I said, while our guests ate nude seconds of mashed potatoes, and Keith shrugged and said cheerfully, “Oh well!”
 
Now if you’re a friend or family member, well, you’ve already passed out with boredom because yes, you know, you have been served this exact platter of vegetables at every holiday meal you’ve ever eaten in our company, whether or not I was actually hosting it myself, and I’m sorry. This is what I make at home; it’s what I bring whenever we’ve been invited anywhere. And it’s always more or less like this. Though, that said, there have been many variations over the years, and you should feel free to experiment. Here, the dip is kind of like an Italian green sauce with mayo mixed in—a little pungent, a little spunky—but I’ve made a milder version using lemon juice, lemon zest, and dill instead of the vinegar and parsley, and I’ve added other herbs (marjoram, say, or chives) or lightened it with a bit of sour cream. It’s not mandatory that you trouble yourself with the whole high-concept shades-of-green thing I’ve got going on with the veggies here; you could do lots of one single vegetable (I’ve done all green beans), which makes this very quick and easy to put together, or you could do a fancy rainbow of veggies (radishes, cherry tomatoes, carrots, yellow peppers, broccoli), or you could do raw carrots, roasted cauliflower, boiled new potatoes, or steamed asparagus. Yum.
 
I am partial to the white backdrop of dishes here, though when I complain about the fact that the platter wobbles, Michael says, “I can’t believe that! The quality has really gone downhill, over at the town dump’s free table.” Good point.
 
Crudités with the best-ever Green Dip
preparation time: 1 hour; all the prep can be done the day before.
Two things. One, even though the “cru” in crudités means raw, in France, where they pronounce it croo-dights (okay, they don’t, they pronounce it croo-di-tay), many dip vegetables benefit from a bit of cooking. And two, yes, there’s fish sauce in the dip, and yes you can leave it out, though then you will be missing what our friend Pengyew calls “a little something funky.” Nobody will notice it, I swear, not even the people who always have a heart attack about anchovies, even though they love Caesar salad, which has anchovies in it, I’m just saying.

Ingredients:
Vegetables for dipping (shown here: radishes, broccoli, green beans, celery, Brussels sprouts, fennel, cucumbers, endive)
1 bunch fresh parsley (I use flat leaf) to make something like 1-2 packed cups of leaves
1 tablespoon sherry vinegar (or red or white wine vinegar, or distilled vinegar)
2 tablespoons olive oil
1 glove garlic, smashed and peeled
¾ teaspoon kosher salt (or ½ teaspoon table salt)
1 teaspoon capers (optional)
½ teaspoon fish sauce or an anchovy or two (optional)
Freshly ground black pepper
1 cup Hellman’s or Best Foods Mayonnaise (not low-fat)

Begin by preparing the vegetables (below). Now make the dip: 
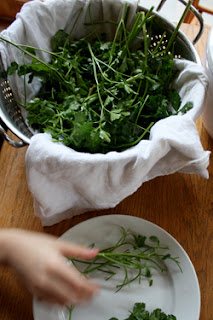
wash the parsley in a large sink of water, spin it dry, then pull the leaves from their stems, without deranging yourself over the smaller stems, which are fine to include; this is a wonderful job for a seated child or an adult with a glass of wine. In a food processor, whir together the parsley, vinegar, olive oil, garlic, salt, capers, fish sauce, black pepper, and ¼ cup of the mayo. Stop the motor to scrape down the sides every now and then, and when it’s quite finely ground together, add the rest of the mayo and process until smooth and green. Can you do this in a blender? I’m not sure. I once—once—made pesto in a blender, and after I tried to cram the basil while the machine was still running, we ended up calling it “wooden spoon pesto,” so I’m the wrong person to ask. Taste the dip for seasoning—it should be quite tangy and salty, so add more salt or vinegar as you need to—then scrape it into a small bowl, cover, and chill until you’re ready to eat it.

Veggie Prep School:
All veggies can be prepped, then wrapped with their own kind in paper towels or clean dishtowels and stored all together in a big Ziploc in the fridge until you’re ready to arrange them on a platter.
Green beans: Snap off the stem ends, then drop them in a large pot of boiling water (steam them if you prefer), scoop them out after a few minutes, when they’re tender and bright green, and rinse them well in cold water before wrapping them up in a dishtowel to dry.
Broccoli: Cut off the big stem, peel it, and slice it into narrow sticks. Cut the rest into elegant florets. Blanch it all in the boiling bean water for 2-3 minutes until just crisp-tender and bright green, then drain, chill, and wrap as for the beans.
Fennel: Trim off the feathery top, any damaged looking outer leaves, and the very bottom, then cut the bulb into vertical slices and cut each of these in half. The core will keep them largely intact. Toss the slices with a bit of olive oil and salt, then roast these on a foil-lined baking sheet at 450 for around 10 minutes until they’re browning and tender.
Do the Brussels sprouts the same way: trim them, cut them in half, toss with oil and salt, and roast alongside the fennel, on the same sheet even (cauliflower is also good this way too).
Celery is simply cut into sticks; radishes are washed and trimmed; cukes are cut into wedges or slices; endive is separated into leaves that only I will eat.

DIY Vanilla Extract


This is a great DIY gift that's fairly inexpensive and also really easy, and it’s something the kids can make all on their own for lucky teachers and grandparents. (If you happen to be a teacher or grandparent of anyone in my house, please practice feigning surprise thus: “Ooh, vanilla! How lovely!”) Plus, homemade vanilla extract is significantly more festive than the equally thrifty idea I had of handing everyone a bag of grubby turnips with a red velvet bow tied around it. Merry Christmas!
So easy, your kid can make it in his bathrobe!
If you already have vodka and a computer, you can make the extract a week from now without ever leaving your home! That’s right—the supplies can be ordered online, and then you will need to wait a few days for them to arrive, sitting around in your bathrobe and tasting the vodka every now and then to make sure it hasn’t gone off. And later the vanilla can be put up to steep in the dark somewhere while you kick back with the remainder of the vodka—or, and I’m not actually recommending this, while you pour a little splash of vanilla-scented vodka out of the extract bottles and into your eggnog; if you pour a teaspoon or two equally from each of the bottles, your children will never even miss it.
Would it have been cheating to start with vanilla vodka? Because I considered it.  But then Michael said, "I know! Why not just start with vanilla extract?" Oh.
However, if you’re in a rush, then the supplies can likely be found at stores nearby (plus, it’s the winter, so you can shop happily braless beneath your down jacket and nobody will even know, unless you run into a friend who invites you back to her house for cocoa, which you’ll sip awkwardly with your arms crossed in front of your chest). The problem with buying ingredients locally is that the vanilla may become prohibitively expensive to make, since a single pair of vanilla beans goes for something like $10 at Whole Foods. Buy them in bulk online. I bought mine from the ebay seller “organic-vanilla,” who sells 21 beans for $9.75 (free shipping), here. And I got my bottles from the ebay seller “candlechem,” who sells 12 4-ounce glass bottles for $12.95 ($12.52 shipping), here.

This is the moment when I must confess that I have always heard the expression “Bourbon Vanilla,” and so used to make vanilla extract with Jack Daniels. Don’t get me wrong—it’s delicious. But it turns out that “bourbon” all along referred to a particular kind of vanilla, and not to my favorite sour mash whiskey! Aha! And so now I make it with vodka.
The vanilla will, ideally, steep for a month—it gets stronger the longer it sits—but don’t be put off at all by the timing: you could simply put a little tag on each bottle with a date of first use; or you could do what the kids and I are doing, which is to use paint chips for labels, and tell the recipients to wait until the vanilla is the darkest shade on the chip before using it. Plus, paint chips may just be the world’s greatest freebies.

And if this whole vanilla thing isn’t your cup of tea, you could always make Salted Caramel Popcorn. Make it anyways, in fact, because it is so insanely good and your kids will love you for ever and ever, and if they can ever stop joking about how the ballet should really be called “The Buttcracker,” they might even tell you this themselves. I  packaged the popcorn in plastic bags inside new, empty gallon-sized paint cans (I got mine for $3 each at the hardware store). I was thinking of sticking a mailing label right on the can and shipping it that way. Does anybody know if that will work?

Vanilla Extract
active time: 10 minutes; steeping time: 1 month

For each 4-ounce bottle of vanilla extract, you will need 2 or 3 vanilla beans (we used 2 ½ beans per bottle) and ½ cup of vodka. Give your kids a clean pair of scissors, and have them cut each vanilla bean in half lengthwise and then again crosswise, and stuff all the pieces into the bottle. Now they can use a funnel to pour the vodka in. This is easiest to do if you have first measured it into a small, spouted measuring cup, which is why I like to have Ben pour it straight from the ginormous vodka jug so that every single bottle fills up and spills over because it’s like filling a thimble with a hose. Oh well.

If your children are very particular about which bottles they personally filled, then you can mark the lids with tape, like I had to. Otherwise, just be nice and regular and communal about the whole thing. Settle your vanilla in a nice darkish spot, and leave it for as long as you can, shaking it when you think to. When you’re ready to give it, attach labeled paint chips with clear packing tape, and tie on a festive ribbon. And wouldn’t it be nice to give with it your favorite vanilla-flavored recipe? Oooh, that’s a good idea.

Parmesan-Rosemary Butternut Gratin


I want you to know that I only run a recipe here if it's excellent enough to actually buy the ingredients for. And I'm mentioning that because I'm self-conscious about our winter farm share. We have a basement full of the guilty evidence of our crime--the crime of not using enough root vegetables--with grubby parsnips and rutabagas stashed everywhere like dead bodies. But just because I have 50 pounds of turnips to use by Tuesday doesn't mean that you need to be making turnip stew this week. I understand that, I do. Nor do you need to be making Special Mixed Root Vegetable Soup or Special Mixed Root Vegetable Puree. You may, actually, need to make Special Roasted Mixed Root Vegetables, so stay tuned, but I really do try to spare you the worst of it.

The squash, though, is a different thing. It's true that I am cramming them everywhere--"Mama, what's this orange thing in my tamale pie?"--but it's also true that I can still get excited about a fantastic squash recipe, one that shows off their sweetness and substance. A designation recipe. And this is just that kind of recipe: it's creamy and cheesy, simple and rich, like the mac and cheese of the squash world. While it's baking, your house will fill with the aroma of rosemary and toasting parmesan--a smell that is somehow enticingly green and brown, despite the obvious orangeness of the actual dish--and then the squash will taste exactly the way you thought it was going to, and a chorus of tiny angels will fly in a halo around your head, singing about Vitamin A and what a great cook you are and good for you to use the squash before it rotted.

It's also such an easy dish that it's kind of ridiculous: you spend about 1 second assembling it (after you've wrestled the squash into cubes), and then it just manages itself in the oven with spectacular results. I made it for a potluck, and everybody loved it. I forgot about it in the oven for an hour, and all the cream cooked completely away and the squash melted and the top got deeply browned, and everybody loved it. We joked about how, with Anni gone (her sister's having her own baby!), we would never finish it. And then we finished it. I served the gratin with a simple, sharply dressed spinach salad and bacon that we'd just gotten from our pig-farming friends, and it was such an exquisite, balanced, honest meal that we sat at the table afterwards patting our bellies and sighing. You'll see

Parmesan-Rosemary Butternut Gratin
Serves 4-6
Active time: 15 minutes; total time: 1 hour

If you're squash is a little bigger or smaller, don't fret--just adjust the cream and salt accordingly.

1 butternut squash (2 1/2 pounds), peeled, seeded, and cut into 1-inch chunks
3/4 cup heavy cream
1 1/2 teaspoons kosher salt (or half as much table salt)
1/2 teaspoon freshly chopped rosemary (or dried, if that's what you've got)
Black pepper
3/4 cup freshly grated parmesan

Heat the oven to 400 and grease a casserole dish.

Arrange the squash in the casserole. Combine the cream, salt, rosemary, and black pepper, whisk it with a fork, then pour it over the squash. Toss the squash a bit to coat each piece with the cream mixture (I use my hands for this), then cover tightly with foil and bake in the middle of the oven for half an hour.

Uncover the squash, gently stir in half the cheese (I use a rubber spatula for this), sprinkle on the remaining cheese, and bake, uncovered, another 15 minutes or so, until the top is browned and the squash is tender when you pierce it with a knife. Allow the casserole to stand for 5 minutes before serving so that the cream can thicken up.

Cranberry Upside-Down cake


Now this particular cake, as you have noticed by its title and appearance, is made with cranberries, but I have baked it with many other fruits ranging from the classic pineapple to the bracingly delicious rhubarb; come spring, I am even somewhat famous for the latter version. But cranberries are just so gorgeous in their ruby way, and they’re so delightfully seasonal in the bright cold of November. Although, please note that I am not recommending that you make this for Thanksgiving, because to tamper with anybody’s pie tradition is like erecting a wailing wall around your grateful table, and believe me—it’s just not worth it. But it’s a nice little cake to make this week, when you’ve picked up an extra bag of cranberries and are feeling festive.
 
A few notes on children. A sinkful of water, with a bag of cranberries dumped in? Oh, it’s good. Do this, even if you’re not making the cake. It’s worth the cost of the berries just to watch your kids’ ecstatic relationship to those tiny bobbing orbs. Give them a small sieve, spoons, funnels, whatever—and then ask them to please do you a big favor and wash the berries for you, and fish them out into a colander when they’re done. Then run yourself a bubble bath, pour yourself a glass of wine, and read the Boden catalogue cover to cover, because the kids will be happy for an hour. Then put the Boden catalogue straight into the recycling, because why torture yourself, and go bake a cake.

Cranberry Upside-Down Cake

Ingredients
For topping
1/2 stick butter (4 tablespoons)
3/4 cup plus packed light brown sugar
1 12-ounce bag cranberries (if using frozen, don’t thaw them first)

For cake
1 1/2 cups flour (I use half spelt)
1 1/2 teaspoons baking powder
1 teaspoon baking soda
1 teaspoon kosher salt (or ½ teaspoon table salt)
1 stick (1/2 cup) butter, softened
2/3 cup granulated sugar
1 teaspoon vanilla
1 teaspoon grated orange zest (1 large orange)
2 eggs
1/2 cup buttermilk
1/4 cup milk

Heat the oven to 350. Now begin with the topping. I prepare and bake this cake in a very well-seasoned 10-inch cast-iron skillet; if you’re going to be using a cake pan, then you will need to do the butter and brown sugar part in the oven, and you may want to line the pan with parchment first, but I’m not entirely sure. For skillet-users: melt the butter over medium heat, then stir in the brown sugar and cook, stirring, for a minute or two. Spread the mixture out as best you can, and leave it to cool while you prepare the cake batter.
Sift (or, hello lazy friend, whisk) together the flour, baking powder, baking soda, and salt. Meanwhile, in an electric mixer, you are beating together the butter and sugar until they are very fluffy—stopping to scrape down the bowl if there’s a dead spot down there, below the beater, like there is with mine. Add the vanilla, the orange zest, and the eggs, one at a time, beating well after each. With the mixer on low speed add the flour alternately with the buttermilk and milk, which you’ve sensibly mixed together in the measuring cup. Do you know how to do this alternating thing? A third of the flour goes in, you mix it until it just disappears, then add half the milk and mix briefly, then more flour, etc, ending with flour (three lots of flour, two lots of milk, alternate side of the street parking Wednesdays and Fridays). Beat until just combined, or risk overbeating and baking something with the delicate texture of an anvil. 
Now pour your clean berries (I rub them dry in a clean dish towel) into the prepared pan, shake to even them out, and spoon the batter over them in large blobs which you will smooth and spread together very gently with a spatula so as not to disturb the berries which are, shhhh, sleeping at the bottom of the pan. Bake the cake in the middle of the oven until golden, about 40-45 minutes (you can use the clean-tester method here, though I always just eyeball it). Now—this is important—cool the cake in its skillet on a rack for exactly 15 minutes, then run a knife around the edge of the cake, then place a large plate over the pan with one hand while your other hand is busy having an oven mitt on it and holding the skillet’s handle, and then use the toes of one foot to light a few votive candles prayingly while you invert the cake, holding skillet and plate tightly together and then removing the skillet with an optimistic flourish. Serve warm with—what else?—whipped cream or vanilla ice cream.